Brooding On

Holy Sweet Potato!

According to my organic gardening handbook, my sweet potatoes are ready for harvest once the first frost kills off the green foliage.  BUT,  I decided to go ahead and do it today. 

Here's why:
1.  I've noticed lots of bugs/caterpillars on the foliage lately.   I read that sometimes leaving potatoes in the ground too long can result in insect-damaged roots. 
2.  I've about decided that frost may never come.  Here it is, late October, and we've still got 80 degree weather in our 10-day forecast.  My impatience and curiosity are getting the better of me.  What's been going on under that soil for the past 4 months?
3.  I could take advantage of the warm weather in the forecast and use the garage to cure my potatoes.  My book suggests allowing sweet potatoes to sit at 80-85 degrees for 2 weeks to prolong shelf-life.  My stifling garage should do just fine.
4.  It was just such a beautiful day today.  It made me want to just sit in the sun and get my hands dirty (literally).
Here's what the garden bed looked like before I dug in.

Scarf and Milkshake lend a hand.

2 wheelbarrowfuls of foliage, ready for the compost pile

That's a whole-bunch of sweet potatoes!  Looks like the blog is going to be full of sweet potato recipes this fall!

The garden bed once I was finished digging

Habaneros or Parsley, anyone?

It seems I've got more Habanero peppers than I know what to do with.  I've already used some for salsa, but they're too hot for us to just munch on raw. 

We've also got parsley aplenty!  I chose a variety this year that boasted that it would be slow in going to seed and would thus produce for a longer period of time.  It's definitely proven true to it's word.  This parsley is abundant and fragrant and has been producing for several months now.

If you could use some of either of these, please let me know, and I'll see how to get it to you!  Cold weather will be claiming them if they aren't harvested soon, so speak up quickly!

Cold Frame Update

Well, we had some pretty strong winds and rain over the weekend, and the cold frame still stands! 
So far, it seems to be working well.  I love how the plastic sheeting really holds moisture in so that I don't have to water very often!

Here's a peek inside.  We've got a couple of different varieties of lettuce and spinach coming up.

And, if you look closely, there are some little shoots of kale coming up, too.

Hopefully, we'll have fresh greens ready for the table soon!

Salsa Canning!

This past Tuesday, my friend Jessica and I got together for a salsa canning party!  Our little ones played/crawled around our feet as we went about putting up 22 jars of salsa.  Now, we had already canned salsa at our September Canning Club meeting, and it had turned out great.  We, however, didn't yet have access to the recipe we'd used in class, so for our own endeavor, we used this recipe
Though John claims it is "the best salsa outside of a restaurant" he's ever tasted, I found it only okay.  Now, let it be said that that is probably not the fault of the recipe.  The recipe calls for 10-12 peppers and doesn't really specify which ones to use.  We used a combination of bell peppers and habaneros because that's what I'd just harvested from the garden.  I think that the citrus, sweet taste of the habaneros lent a sweet and spicy flavor to the salsa that seemed a bit odd to me. 

At last night's October Canning Club meeting, I got my recipe book in.
This means that I now have access to the salsa recipe we used in class.  Next year, I'll plan to can a bunch of it using these ingredients:

7 quarts peeled, cored, chopped Roma tomatoes
4 c. seeded chopped long green chiles
5 c. chopped onion
1/2 c. seeded, finely chopped jalapeno peppers (wear gloves when cutting up peppers ;)
6 cloves garlic, finely chopped (maybe more -- I love garlic!)
2 c. bottled lemon or lime juice
2 Tbs. salt
1 Tbs. black pepper
2 Tbs. ground cumin
2 Tbs. fresh cilantro, chopped (maybe more -- I love cilantro!)

Directions:
If you like a more processed Mexican-restaurant-style salsa (like I do), be sure all your veggies have been pulsed in a food processor to the desired consistency.  Combine all ingredients except cumin and cilantro in a large pot and heat until boiling.  Reduce heat and simmer for 10 minutes.  Add spices and simmer another 20 minutes.  Fill hot jars with salsa, leaving 1/2" headspace.  Remove air bubbles.  Wipe rims of jars.  Add lids and rings.  Process for 15 minutes in a boiling water bath.

Yummm!

When Life Gives You Peppers . . .

 . . . make SALSA! 
The garden peppers have been ready for awhile now, but I've been so busy that I haven't had a chance to put up any salsa, so I just let them hang out on the plants since they keep best that way anyway.  But, with freezing temps in view, it was time to harvest those peppers and get to canning!  Unfortunately, my tomatoes are long gone, so we'll have to go with store-bought.  There are two bright sides, though:  1. our store has been trucking in Missouri tomatoes, so at least they're not traveling too far a distance, and 2. they're only $.99 a lb. this week.

So, my friend Jessica and I are planning a little salsa canning party this week.  We plan to use a recipe that neither of us have made before but comes highly recommended, so we'll see.  So, check back.  If it turns out well, you know I'll be posting the recipe!

Cold Frame Construction

I usually am not one to procrastinate.  It just stresses me out to wait until the last minute.  I even stress out about other people's procrastination.  (Just ask John.  When he was in grad school, he finally learned just not to even tell me when his papers were due.)
But, lately, I feel like I've been running, running, running and am still a few steps behind.  So, this week, I found myself with new adorable lettuce sprouts and a forecast of freezing temperatures.  Ahhh! 

I had to construct the cold frame and I needed to do it . . . um, yesterday!
I set to work to create this.

Here's what I did:

I started with 4  10 ft. pieces of 1/2" PVC. 

I then cut one piece so that it was 8 ft. long.  Since my covered-wagon design was intended to cover a 4'x8' raised bed, this 8 ft. piece would span the length.  (The leftover 2 ft. piece became Little Boy's sword for the rest of the day and entertained him for hours!)

To screw the PVC pieces together, I used nuts and bolts.  I was sure to use rounded edge bolts so that they wouldn't snag and tear the plastic sheeting that would be draped over the structure. 


I screwed the 3 10 ft. pieces to the 8 ft. cross piece like this.

(Sidenote:  At this point, I learned a very important lesson in physics.  The lesson is this:  Do not use 1/4" bolts to screw together 1/2" PVC.  When you bend the pipes, they will break because too much of the width of the PVC has been compromised by drilling.  When I learned this lesson the hard way, I cursed myself for procrastinating, got a phone call from John saying I needed to drop everything and go haul hay with him, told him I'd meet him as soon as I could but I HAD to make a quick run to the hardware store.  I purchased 1/8" bolts this time and new PVC, went to haul hay for 3 hours, then proceeded to rebuild the cold frame in the rain, finishing just as the sun set.  Uggghhh.  Procrastination!)

Once I'd learned my lesson, and reconstructed and installed the frame, it looked like this.  (Notice how it's getting dark.)

I then used this plastic sheeting to create a cover that will allow light in while protecting plants from extreme temperatures, much like a greenhouse.

I then used rocks to secure the plastic sheeting.  These are easily removed for harvest and watering.  Hopefully, this cold frame will allow us to extend our growing season a bit and continue to have fresh greens for a while longer.  In the spring, it will also allow me to plant in this bed earlier than in others, cutting down on how many seeds I'll have to start indoors to get a jump start on the growing season.  And, because it's only held together my 3 bolts, it can be easily stored when it's not needed.

If I hadn't had my little mishap, the project would've cost me about $25 (in reality, it cost me $40).  Oh, well.  You live and learn.


Berry Blessings

With tonight's first frost forecast for our region, this may be my last breakfast of champions for awhile. 
What could be better than a big bowlful of granola, backyard strawberries, homemade goat milk yogurt, and a drizzle of honey?

I feel pretty spoiled that I've gotten to eat this for breakfast as often as I have since spring.  It seems that these berries just kept on producing.  They took a brief break during the hottest weeks of the summer, but for the most part they've produced for months. 

I wish I remembered what variety they are.  I do know that they're a very tender berry that would never make it to market.  They're at once sweet and tart, but they bruise easily -- even just in transport from the yard to the kitchen and are best eaten immediately after picking.

What's the saying?  "There are two things in life that money can't buy:  love and homegrown tomatoes."  I'd add backyard berries to the list. 
 Farewell, sweet berries, until next spring.  You'll be greatly missed!

Loropetalum: What's Going on Here?

With the drought we had this summer, I'd expect to have plants dying.  But, this I just don't get.  See the very much alive and blooming plant on the left?  And the very much dead and dry plant on the right?
These plants, are Loropetalum, commonly known as Fringe Flower or Chinese Witchhazel.  They were planted at the same time (maybe 5 years ago?) and receive the same amount of water and sunlight.  They are (were) well-established plants that had previously lived up to their claim as low-maintenance plants. 

Beautiful blooming shrub

Dead-as-a-doorknob shrub

So, more experienced gardeners, what's going on here?  Obviously, the situation is beyond the point of asking for suggestions.  But, I'd at least like a little explanation so that I can avoid this problem in the future.
:(

Hmmm.  That sure is a guilty look.  Is there any way Dexter could be culpable in this?

Anybody Ever Tried Barbecued Dog?

This was the sight that greeted me this morning on the backporch.


Yep, those are the carefully planted fall garden starts.  If you remember, I'd been tracking their progress, comparing the ones started in our compost to ones started in Miracle Grow.  Well, Dexter seems to think they tasted about the same.  Or at least the little newspaper pots rip equally well. 

Oh, the carnage! 

Okay.  There may have been some not-so-ladylike language and perhaps even a Croc shoe hurled in his direction.  Please suspend judgment.  It was, after all, before 6am on a Saturday.  And, no kids were around to hear the language or witness the violence.  And, I've been nursing these plants for a couple of weeks now. 
When John and I came home from running our 5K race this morning and were famished, just like the kids we came home to, I proposed barbecuing Dexter.  It was such a nice day out, we could just string him up over the fire pit, I told them.  We put it to a vote and I lost, 4-1, so I guess we won't be eating him, after all.   . . . Or maybe they just don't like the idea of barbecue.  Maybe they'd go for a little CrockPot Canine.  ;)

If my kids didn't love him so crazy-much, I'd be serious about finding him a new home.  Maybe I'm going to have to fence in my garden area. . . . and all the kids' toys . . .  and my outdoor furniture . . .

Uggghhh.  Even after the horror of discovering the dirt-strewn porch this morning, I couldn't help but smile as I watched him and Girl 2 chasing each other around the yard, -- she in her pajamas; he jumping like a trout on the line to higher than her head.  They absolutely love each other.  I think that if he and my garden could just figure out a way to peacefully coexist, we'd be good.

Suggestions?

Science Fair Project Update

Okay.  It's not really a science fair project.   Thankfully, I won't have to put together a colorful tri-fold posterboard about this science experiment.  Though, my mom was right, if the girls were in need, this would make a decent science fair project. . .

Especially considering how it's turning out so far.
Can you see it?

Here we go up close.  This is the left side-- the side where the seeds were started in our very own compost from the pile.

And, this is on the right side -- the side where the seeds were started in Miracle Grow Organic Potting Mix.  Wow!

For those naysayers out there, be aware that I'm rotating the box every-other day, so neither side is getting more sun than the other and they're being watered the same amounts and at the same time. 

Only time will tell whether the compost plants will be stronger or produce greater yields, but it's safe to say that they definitely sprouted the seeds faster than the traditional mix. 

Fall Garden Experimentation

It's that time of year again . . . yep, time to pull out those old under-the-bed boxes and start some seedlings!  (What?  Did you think I meant switch out clothes for the season?  It's still a bit early for that, I'm afraid.)  I used the homemade newspaper pots again (click here for a tutorial).  This time, though, I won't have to give up my guest room/sewing room/craft room since I'll be starting these seeds on the back porch.  Outside temps in the shade have actually been just right for sprouting seeds lately.
I decided to conduct an experiment this time.  The seeds in the pots on the right are planted in the Miracle Grow Organic Potting Mix that I used for spring planting.  The seeds in the pots on the left are in finished compost straight from our compost pile.  I made sure that the seeds are evenly divided, so I've got just as many kale seeds on the left as on the right, for example.  I'll be interested to see . . .
1.  which seeds sprout first
2.  which plants grow faster
3.  which plants make the transition to the garden better
4.   whether the tiny amount of soil they're started in has any bearing on the size/productivity of the mature plant

What seeds did we start?  3 varieties of lettuce, Swiss Chard, kale, and spinach.  We'll see how it goes.  Stay tuned!

Hurricane Isaac Visits Cave City

Here he is, moving in.

I'm not sure how much rain we received thanks to Isaac.  And, honestly, it's hard to rejoice in the much-needed rain, knowing that the same storm that provided it has caused others less fortunate so much damage.

This is really all the "damage" incurred at our house -- some downed tomato plants -- though I know of some local folks who suffered damage a bit more serious.

It was, of course, a problem easily fixed.  (Maybe next year I shouldn't be so cheap and should just invest in some tomato cages.  I've had to resurrect these poles countless times this year because our soil mix is so loose.)

A funny tidbit related to the storm . . .

Girl 2, who is 6-years-old, had been asking so many questions about Hurricane Isaac:
"Is he coming to Cave City?"
"When will he be here?"
"Why is he dumping so much water on us?"
"Where does he get the water?:
"How did he get here?"

It wasn't until she finally got to "Why is he so mad at us?" and "Did he drive here or did he come in an airplane?"that I finally realized she thought we were talking about a person.  ;)  She was thinking that this Isaac sure was a powerful and vengeful fella!  Of course, she played it off like we adults are the silly ones once I'd set her straight:  "That's so silly that they give storms names!"

2 Good Reasons to Get Your Hands Dirty


This month's issue of World  Ark, Heifer International's magazine, featured a great article on farmers of the world, "Sorry to Eat and Run, But . . ." by J. Malcolm Garcia.  In it, he compares American farmers to farmers in the rest of the world. 

"Subsisitence agriculture, where small farmers grow their own food to feed their families, remains common in developing countries.  The typical subsistence farm includes a variety of crops and animals the family needs to feed and clothe themselves during the year.  Planting decisions are made with an eye toward family needs for the coming year rather than market prices. 

"Roughly 65 percent of sub-Saharan Africa's population relies on subsistence farming.  For instance, 86 percent of Ugandans earn a living through subsistence farming; 85 percent of Angolians also rely on subsistence farming.  Most of the economies of Lesotho, Malawi, Zambia, and Rwanda are also based on subsistence farming."

In the U.S., however, most farms are growing one or two crops, and they're doing it LARGE scale.  "Today, fewer American farmers feed more people than ever before in the history of food production.   . . . And, virtually none of these farmers feeds his or her own family with homegrown crops."

So, even the most successful farmers in the U.S. are not growing to feed their own families.  They have to head to the store to do that.  "Nearly 80 cents of each dollar Americans spend for food goes to pay for marketing services -- processing, packaging, transportation, storage and advertising.  . . . All of these costs are associated with getting food into the most convenient form and packaging, sending it to the most convenient location at the most convenient time, and then convincing us to buy it.  As consumers, we pay far more for the conveniance of our food than for the food itself."

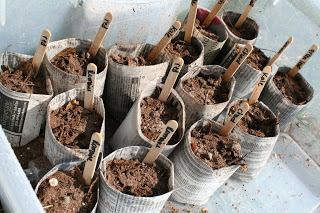
I don't know about you, but I like the idea of being a citizen of the world, connected even to those who are 1/2 a world away.  It's difficult as Americans who have every modern convenience at our fingertips to relate to those in developing countries.  What do we have in common?  What do we share?  Well, lots of things, but one is this:  the land.  We forget that we depend on the land, and most Americans don't act like we need it.  But, the simple act of digging a hole and planting a seed serves to connect us more with the world at large. 

The article encourages, "Gardens are a teacher.  . . . Gardens reconnect us to where food comes from.  People do it to get their hands dirty.  We've taken the tactile experience out of our environment [here in the U.S.].  Convenience has replaced feeling.  We garden because it feels great.  It's very natural."

And, isn't it true?  It seems that we Americans are always conjuring ways to get back to nature:  camping, hunting, fishing, kayaking, gardening.  There's something in us that wants to be there.  And why not?  We were created there.  God didn't speak forth a high-rise apartment building and then create Adam on the 58th floor.  He formed him out of the earth itself and brought him to life in a garden.


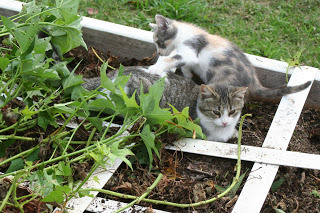
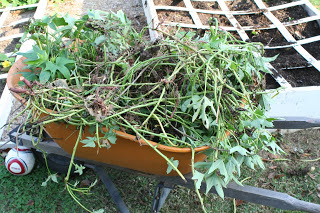
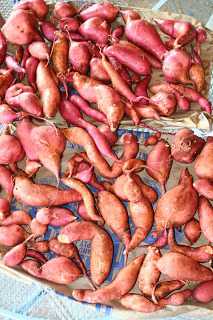
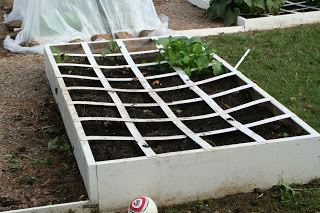
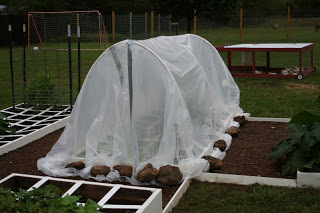
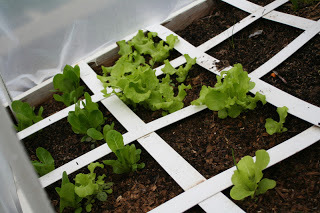
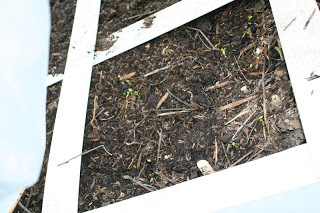
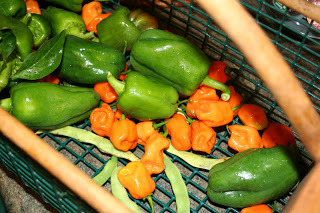
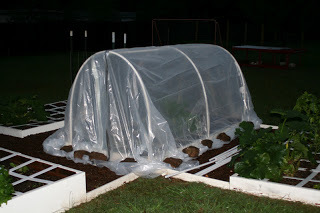
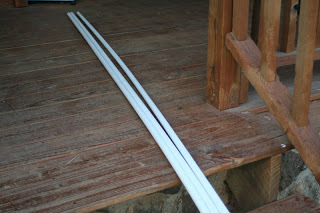
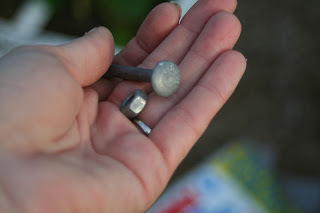
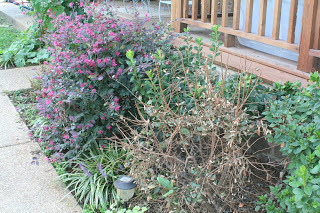
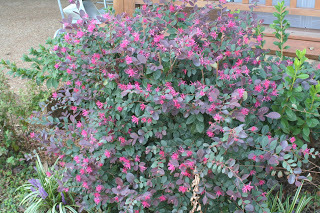
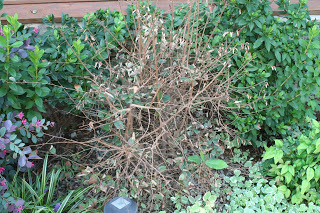
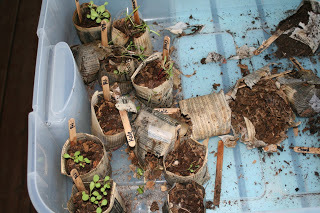
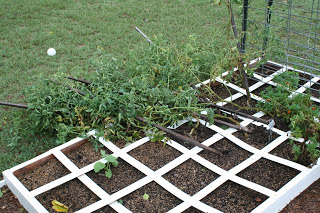
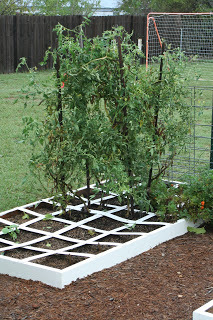
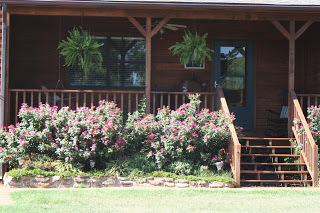
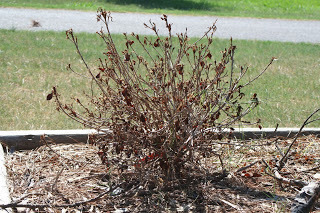
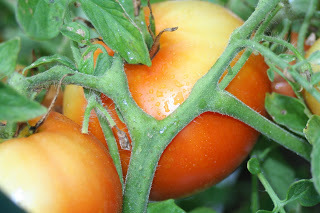
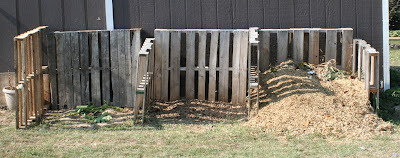
What my garden looks like today -- some things are still kickin' despite the drought!

So, this post may seem rambling, but here's what I take from this article -- two good reasons to get your hands dirty and grow something in your own backyard.
1.  It's what most people on this earth that we call home do.  Everyday.  Do it to be in tune with the rest of humanity and to better understand those who seem so distant.
2.  It's what we're meant to do.  It's not a coincidence that you feel more alive floating the river than you do in an office building.  You can create your own nature and "get back" to it in your own yard, everyday.

Curbside Compost


Composting is really catching on.  In fact, though it's hard to imagine here in a town where I still have to haul my own recycling items to the plant myself, many big cities are moving to a three-bin trash pick-up system:  trash, recycling, and compost.  This allows those who don't have the space to compost for themselves a way to reduce landfill trash and help the environment by turning yesterday's orange peel into tomorrow's fertilizer for the local park.

While great for apartment dwellers who may not have a way to benefit from their own compost pile, compost pick-up is not really necessary for most of us.  With the commitment of a little space and time, most house dwellers can make use of rich compost in their own lawns and gardens.

If you've got the space to set up a simple system, get started! 

Of course, anything that grows is fit for the compost, but here's a list of some things you may not have thought of that can also go on the pile:

1. Coffee grounds and filters
2. Tea bags
3. Used paper napkins
4. Pizza boxes, ripped into smaller pieces
5. Paper bags, either ripped or balled up
6. The crumbs you sweep off of the counters and floors
7. Plain cooked pasta
8. Plain cooked rice
9.  Stale bread (of course, if you've got chickens, give items 7-9 to them -- they'll thank you!)
10. Old herbs and spices
11. Wine corks
12. Paper egg cartons
13. Toothpicks
14. Nail clippings
15. 100% Cotton cotton balls
16. Dryer lint
17. Pencil shavings
18. Contents of your vacuum cleaner bag or canister
19. Newspapers (shredded or torn into smaller pieces)
20. Leaves trimmed from houseplants
21. Dead houseplants and their soil
22. Flowers from floral arrangements
23. Used matches
24. Ashes from the fireplace, barbecue grill, or outdoor fire pit
25. Jack o' Lanterns  (it'll be that time before we know it!)

For a more complete list of things you may be surpised can go to the pile, check here.

Lovin' on My Roses

Those who read the blog regularly know that I LOVE my front yard knockout roses.   (If you're new to the blog and have missed all that, just search "roses" in the side search bar, and you'll see all the rose love from past posts!)
I've had a few visitors comment lately on how pretty my roses in the front yard are and how I must be very diligent about keeping them watered. 

But, here's the truth:  I haven't watered them at all!
 
Seriously.  I haven't watered them this summer AT ALL.

Yes, the hanging ferns get watered a little bit twice daily with the water from the bowl I use to cool the milk after its been pasteurized.  Of course, it makes environmental sense to make use of that water rather than tossing it down the sink, but if you'd seen our recent water bills, you'd understand why water conservation is a top priority around here.

Don't go thinking that our front yard is just beautiful, though.  This is just one of the four azaleas that has met its demise in the front yard.  I blame this on two factors:
1.  The front yard is where plants go to be neglected at our house.  I enter and exit the house via the garage and rarely walk past our front yard plants, so I think they are kind of "out of sight, out of mind" for me. 
Now, things in the backyard look great.  That is, of course, where I spend the bulk of my outdoor time since it is where all our animals live and the garden is located.

2.  This summer has been VERY dry.  I was talking to a, shall we say, quite elderly lady the other day who said that this is the worst drought she'd "ever seen."  Now, trust me, that is really saying something! ;)

So, I blame the front-yard-neglect/worst-drought-ever combination for the dead azaleas.  But, that isn't really the point of this post.

The point of this post is . . .
the knockout roses have endured the same neglect/drought and are as gorgeous as ever! 

Tomato Canning Party

Sam, my Father-in-Law, brought by this huge box and 3 bags full of tomatoes.  Yea!  Our garden has produced enough to keep us in BLT sandwiches but hasn't provided enough for canning, so I was thrilled with this great gift!

I quickly took John up on his offer to help, and we got to work once the kids were all in bed.

My Mamaw Carroll taught me how to can tomatoes just like she does it.  I felt like I was on a cooking show as I taught John how to do each step of the process.  :)

It's messy business.  In fact, if I'd taken pics at the height of messiness, they'd rival the gore involved in this past week's chicken slaughter post.

What could have been drudgery was actually a lot of fun since we were working together.

Mmmmm.  They whole house smelled so great!

We made it through the box but still have the 3 bags of tomatoes to go.  Perhaps we'll have another canning party tomorrow night.  Yep, we're wild and crazy over here!

A Prayer of Thanksgiving

Yesterday, God granted us rain!

  It worked out that I was able to do my afternoon, backyard chores during the gentle rain, and it was such a blessing to feel that sweet wetness on my skin!  The garden already looks happier.  I set out to find a prayer in thanksgiving for rain.  My search turned up many prayers requesting rain and not a one specifically thanking God for answering the prayer.  There's a lesson for us in there.
There is rain in those clouds!


Rain drops on our tomatoes

For anyone who may have not yet received their long-awaited rain, here's a beautiful Catholic prayer I found in my search:

O God, in Whom we live and move, and have our being, grant us rain, in due abundance, that, being sufficiently helped with temporal, we may the more confidently seek after eternal gifts. Through Christ, our Lord.  Amen.


And, if you, like us, have experienced that long-awaited end to the drought, maybe you'd like to join with me in this simple prayer of thanksgiving . . .

Thank you, Lord, for the rain you sent in answer to our fervent prayer -- for the salvation it provided parts of your creation.
Thank you that you never stop providing. 
Thank you for keeping us ever mindful of our dependence upon you. 
Thank you for the many lessons you teach us through the workings of your creation, if only we have eyes to see and ears to hear you in it.  Amen.

Blossom End Rot

It's officially tomato season at our house, and, oh, how sweet it is!  While it hasn't damaged too many fruits, I have noticed my first case of blossom-end rot since I've started gardening.  It's pretty easy to diagnose blossom-end rot.  Basically, you're dealing with blossom-end rot if the blossom end of your fruit shows signs of, um,  rot.  It's quite an appropriate name, it seems. 
This tomato (picked from a neighbor's garden) looks great from the top.

But, turn it over, and you'll discover that brown, leathery patch of rotted tomato flesh.

I've talked to several local gardeners who are currently experiencing this problem.  It's no surprise, either, since the primary cause of blossom-end rot is insufficient moisture, and we've been how many days/weeks without rain now?

Anyway, for those gardeners who aren't familiar with this condition and are shocked and dismayed by that hideous leathery patch, I've got only good news for you.

It's not a disease; it's a curable disorder.  In other words, there's no need to pull your plant up by the roots and go tomato-less until next year.  
The rot is caused by a lack of calcium reaching the fruit.  Usually, in organic gardens, this has nothing whatsoever to do with the calcium content of the soil itself, and everything to do with the plants not having enough of the calcium-delivery-system -- water.  Besides a lack of moisture, over-fertilization is another frequent cause of blossom-end rot.  According to Rodale's Vegetable Garden Problem Solver, "Applying too much nitrogen fertilizer may cause blossom-end rot by stimulating so much leaf growth that there's too much competition for calcium."   Since my plants are not super bushy, I suspected that my problem stemmed from the drought, but it did seem like the perfect time to try out one of my Mother's Day gifts, a pH soil tester.

According to my tester, our soil pH is just fine at 6.5.  If it measured much lower, it would benefit from the addition of lime. 

If you have some affected fruits currently green on the vine, pluck them off and feed them to the chickens or compost pile.  There's no need to keep them there when new, healthier fruits could make better use of the plant's resources.  If, however, you happen to bring in a ripe tomato that has been affected, just slice off the yucky portion, and use the rest.  While it's not a pretty fruit, worthy of the farmer's market, it should still taste just fine.

Rabbit Poop Tea

As John walked through the kitchen yesterday, I just casually mentioned, "Hey, I've got buckets of rabbit poop tea steeping over by the hose, if you're wondering what that is.  Please don't pour it out."  He just stopped and gave me a very grave look, "Those are words I don't ever want to hear put together again." 
Yep, he's a funny guy.  Sometimes I need someone to ground me and remind me that I'm not normal.  I've grown so accustomed to our little farming life, that those words didn't seem so strange to me.  Without reminders like that from John, I might go blabbing at Mom group about how my rabbit's poop has done wonders for my tomatoes and really gross some folks out.  Some of what happens in the backyard just isn't to be discussed among polite society.  Luckily for me, this blog is designed to be about the goings on of our backyard, so if reading about rabbit poop tea is just too gross for you, click back tomorrow for an astounding garden veggie pasta recipe (you don't have to think about what fertilized the veggies atop our pasta unless you want to  ;).

Rabbit poop is an excellent fertilizer that doesn't have to break down or compost before being added to the garden.  That is, after all, why we first decided to bring Cocoa Puff to our home.  But, the poo pebbles themselves take awhile to break down in the soil, and thus it takes awhile for the plants to reap the benefits of the fertilizer.  The trick is to get the rabbit poo into a form that is more easily absorbed by the plants' root systems -- liquid.  One gardener touting the benefits of rabbit poop tea (more politely referred to as rabbit manure tea -- although I hardly think that makes it more palatable a concept) called it "rocket fuel" for the garden. 
Here's what I did.  I used two of John's old t-shirts (ones with yellowed pits -- could this blog entry get any more disgusting?) and cut them up so as to create two big rags from each t-shirt.

Then, I gathered 4 big buckets and some rubberbands . . .

 . . . and made my way over to the rabbit poop tub.

I placed a big scoopful of poo in the center of each rag and tied them up with the rubberbands.

I placed the "tea bags" into the pails and filled them with water.  The sun will do the rest of the work, steeping the tea all day long.  I'll let them steep for a day then use the tea to water the garden. 

If you have a worm bin or compost pile that is ready for use, you can brew a worm castings tea or compost tea in the same way.  Your garden will thank you.

There are a lot of things I've enjoyed about gardening organically.  One of them is definitely learning creative ways to tend the garden.  Organic gardening has become mainstream enough that I could just drive to Home Depot and buy some "organic fertilizer," but I enjoy being able to make use of what we have on hand and participate in the cycle that takes the carrot to the rabbit, then the rabbit's poop back to the garden where it's used to grow yet another carrot. ;)

Compost Bin System is Complete

Lovely, isn't it? 

It's definitely not the most high-tech compost bin, but it gets the job done and cost us nothing.  We acquired the pallets a couple at a time.  In fact, the system began with three pallets, encompassing just one pile.  Last night, John affixed the last two pallets to make it a 3-bin system made up of 7 pallets all screwed together.  We figure this is all we'll need to keep us in year-round compost. 

The far-left bin is the newest.  All it has in it right now are the clippings from the squash plant that I cut away this morning.  This will now be the bin we fill with dryer lint, vegetable scraps, chicken poo, garden trimmings, etc. 

The middle bin has just been sitting for 4 months or so.  It is ready-to-use compost.  When we need to add some to the garden, we just scoop it out of this middle bin.

The far-right bin is the one we had been filling up (until yesterday).  Now, it will be allowed to sit and decompose for the next 4 months or so.  We will turn it periodically and be sure that it stays moist to speed decomposition. 

So, now that we have all three bins in place, the functions just rotate.  In 4 months, the far-left will be full and will become the one that is in the process of decomp, the middle will be empty and ready to be filled up, and the far-right will be decomposed and ready for use.