Brooding On

Purchase Your Brood Farm Soap Now!!

My all-natural goat milk soap is now available for sale in the Patti's Place booth of Olde Towne Mall On Main Street Batesville.  Once you're inside, take a left at the register -- you won't be able to miss it.  They're selling for $4 a bar.  Pick up a bar of unscented for your favorite hunter so that he can go undetected in the deer woods and a pick a favorite scent for yourself.  :)


Soap Packaging: I Need Your Help!

 
Another dreary day outdoors . . . another productive day indoors. 
 
Thanks to one of my great family members and faithful readers, I've had a great offer that would allow me to sell soap through a local antique booth.  I'm excited about this opportunity to get my soap out there and see what happens!
 
So, I've been busy getting soaps packaged and ready to go.  Currently packaged and ready are . . .
 
Lavender and Olive
Oatmeal and Cinnamon
Orange Chamomile
 
They are, of course, all goat milk soaps.
 
I've run into a packaging problem, though.  I can only fit so much information on the label without it looking cluttered. 
 
Right now, labels have the farm/brand name, "All-Natural {type of soap} Goat Milk Soap," and our farm location.
 
Since I can't fit much more on the label, I was thinking of setting out a small chalkboard sign that provides a few other key pieces of info.  What should it include?
 
Some ideas:
"all-natural"
"handmade"
"hand-crafted"
"local"
info about what makes goat milk soap different than other soaps
"Meet the goats" (and put the blog address and/or a snapshot of Razz)
 
Or, I could have some business cards made up that would allow a spot for a little more info. 
 
Thoughts?  Suggestions?  If you were the shopper, what would convince you to try a bar?


So Much Soap!


Since school started, Thursday has become Soap Day.  I've churned out about 16 batches of soap so far, and my drying rack is nearly completely full!

Soon, I'll have bars ready to package and will be looking for a good way to sell them. My current plan is to see whether any local boutique-type places might be interested in stocking them. I'd considered an Etsy-type store for online sales, but I really don't think they'd ship well.  Any other ideas?


Use Less

There are lots of more labor-intensive ways to go green and reduce your household carbon footprint, but perhaps the easiest way to reduce is to, ummm, just use less.


This may sound so obvious that it's not worth discussing, but even I need reminding sometimes that a little less will still get the job done.

The companies that bottle the products we use would love for use to use more than we need -- that just means they get to sell more!  A few months back, I had to buy some laundry detergent (I had some particularly foul athletic gear that needed a scented soap).  I was reading the directions and saw that I should fill to Line 1 of the cap for a regular load and Line 2 for a large or heavily-soiled load. So, what the heck was Line 3 for?  It's like they were trying to fool me into using more than is necessary to get the job done. ;)

And, what about shampoo?  Or hand soap?  Or anything else that we pump or pour.  I tried to limit myself to single pump of the shampoo bottle, but it just felt weird.  We're a two or three pump society, at least.

So, how can we overcome the tendency to use more than is necessary?  At our house, we like to water things down. Ever looked at the ingredient list on your shampoo, soap, conditioner, detergent, etc.?  The first ingredient is most likely water.  So, what's a little more?  I promise you, your hair/skin/clothes will still get clean, and you'll still get to do the double-pump, like you're used to.

When I buy John new face wash (pictured at right above), I pour about half of it into the old, empty bottle and fill both bottles the rest of the way with water.  Guess what?  The face wash still gets the job done.  And, I've gotten two bottles for the price of one!

What are some other simple ways to reduce our use of household and cleaning products?

DIY Organic Root Feed

In my research related to homemade organic animal feed, I came across a few references to root feed.  Apparently, this is actually a very old method that predates hay balers.  Before the technology existed to preserve grass in large quantities for winter feeding, farmers would sow a big plot of root vegetables that would basically remain preserved underground until the roots were needed.  Carrots, beets, radishes, and turnips were all favorites.  John tells me that turnips are also great for pig farmers, who can run other grazing animals on a field growing turnips and then turn pigs out to "root" up the roots once they're ripe for harvest.
We happened to have an excess of carrots and beets still in the refrigerator, so I decided to see whether our goats showed any interest in this fare.

Large scale operations would use a food grinder to make the feed more manageable.  I used my food processor.

Razz is a fan!

I'll make a note of this successful experiment and possibly plant a fall root bed with an eye toward winter harvest.  We couldn't grow enough to cover all our feed needs, but we could supplement the goats' diets and perhaps cut back on our conventional grain use.

Follow-up Friday: Avoiding GMO's

As referenced earlier this week, GMO's are a highly controversial topic in the food industry right now.  Unfortunately for those of us who wish to avoid them, the US doesn't yet require foods containing GMO's to be labeled.  This chart, though, can help you in figuring out which foods in your pantry contain them and which are clean.

http://www.motherearthnews.com/real-food/how-to-avoid-genetically-modified-food-zmgz12onzphe.aspx#axzz2aoms2XP8

My Conversation with Feed Guy


As we consider ways we may want to grow our farm in the future, one of the ideas we've batted around is trying to market our backyard eggs and meat chickens.  We'd be able to market them as local and grass-fed.  Since our feed isn't organic, though, we can't claim that the meat or eggs are "organic."  

With all the fuss about GMO corn lately, I suspect that there will be a greater demand for organic meats in the not-to-distant future.  The only sources we currently know of for organic feed would cost us about triple what we currently pay for feed -- and that doesn't even include the enormous shipping costs involved in getting that feed to our doorstep.  So, I set out to do a little research and find out whether any of our local feed stores could get it for us if we promised to buy it all up in bulk.

I made a few calls that basically all dead-ended with "no, we don't carry it, and we can't get it."  Frustrated, I tried yet another supplier.  "Hang on, let me get my feed guy on the line," they tell me.  My conversation with Feed Guy went basically like this:

Me:  Hi. I'm checking into my options for organic chicken feed and wondered whether you carry it or could order it?
Feed Guy:  We don't have anything organic here.  I do have a chicken feed labeled "All-Natural."  I figure that's about the same thing.
Me:  Well, do you know what they mean by all-natural?
Feed Guy (with plenty of sarcasm):  Well, what do people even mean by organic?  Isn't it all the same stuff?
Me (with plenty of exasperation):  Sir, organic is a label certified and regulated by the USDA.  Organic feed can't contain GMO's, antibiotics, pesticides, or animal by-products.  All-natural isn't a regulated term.  Anyone could slap that label on their product and the consumer would be none the wiser.

The conversation pretty much devolved from there.  And, I'm pretty sure he meant his what-do-people-mean-by-organic question to be rhetorical, but he asked the question and he got the answer.  I really am not a rude person.  I think I was bringing with me to the conversation my exasperation from the previous phone calls I'd made and how I always feel like I'm treated differently by these places just because I'm a woman.  Add to that that I'm asking about organic feed, and I could nearly hear this guy's eyes roll through the phone as he probably pictured the granola-crunching, tree-hugging, hippy lady on the other end of the line.
I felt kind of bad about the attitude I had with Feed Guy, but I consoled myself by thinking that, thanks to me, he's now a more informed Feed Guy.  If he actually listened to my answer, he may now be better at his job.  The next time someone asks him about all-natural vs. organic feed, maybe he'll know the answer.
  
And, I suspect that as people get more interested in knowing where their food comes from and what kind of life it's led, Feed Guy may get more and more phone calls like mine.  

For now, we are left without answers and without many leads for sourcing affordable organic feeds.  I've seen some recipes online for mixing your own.  That may be where we're headed.  

Does anyone else have a lead on reasonably priced organic feed?


Why to Support Labeling GM Foods

You've likely at least heard the term GMO or genetically modified organisms.  But, you may not be up on the controversial movement here in the US to have foods that have been genetically modified to be labeled as such.  This is a great article by Mother Earth News explaining why all of us, whether we plan to eat GMO's or not, ought to be in favor of having foods labeled.

http://www.motherearthnews.com/real-food/gm-foods-zm0z13aszmar.aspx#axzz2aoms2XP8

Follow-up Friday: Goat Milk as Cure for Pink Eye!

Remember this post about whether or not goat milk can cure pink eye?


Well, (knock on wood) we still haven't had opportunity to try that remedy out at our house, but we did recently have a friend who tried it out.

Kim, a friend who'd read that blog entry messaged me and asked for some goat milk so that she could try it out on her daughter whose eye was showing signs of a pink-eye-type infection.

As soon as I had some raw goat milk ready, I carried some to her, and they began treatment.

Here's her testimonial:

"We put 2 drops in at around noon, then two more drops before bed. A's only complaint was that they were a little cold! Never any pain.  She woke up the next morning, and her eye wasn't matted together, but there was still a touch of redness to it.  We didn't use anymore drops, though, and by noon the eye looked normal again!"

Excellent news!  So, next time someone in your household is suffering and you'd like to give this little remedy a try, shoot me a message and we'll hook you up!

DIY Lead-Free Lipstick

Guess what?  I've got yet another guest post for you today.  Man!  I feel like I'm on vacation!

According to her mom, Bethany, today's guest blogger, "is currently a sixth-grader at Hallsville Jr. High School in Hallsville, Texas, and is anticipating her eleventh birthday in August.  She enjoys singing, acting, writing, and pretty much any activity that gives her the opportunity to demonstrate her creativity."

I saw on Facebook what this crafty little gal was up to with this DIY lipstick and just had to ask her to blog about it for me!  I know I can't wait to try out this project!  Enjoy!


It all started when I found out that most lipsticks contain lead. Since lead is poisonous to the body, why would I put it on my lips every day? A few days later, I found a video on YouTube for how to make lipstick out of Crayons. Being my curious self, I had to click it. This simple trick saves money, helps you mix and match to find your own style, and is completely safe.

First, you're going to need Castor Oil. You can find it at a local pharmacy. We found it at Walgreens. Then, you're going to need pure Shea Butter. We found it at our local Drug Emporium. Last but not least, crayons! Pick whatever color or combination of colors you want; there are hundreds to choose from!


Next, you need a double boiler, or improvise one like we did with a stainless bowl. Then, depending on how big your containers are, you'll need to put the unwrapped crayon, Castor Oil and Shea Butter in. Here, we are using half a crayon, half a teaspoon of Castor Oil, and half a teaspoon of Shea Butter. It doesn't matter what order you put them into the double boiler. Then, turn the stove to medium high and start stirring. It might take a while to warm up, but in only a short matter of time, you'll have a lipstick liquid. Make sure there are no lumps of crayon left.
Then, you're going to turn your heat off and immediately spoon the liquid into your container. We used a small container from the travel section at Target, but an old lipstick tube will work as well. Then, stick it into the refrigerator for about 10 minutes.

In this picture, we quadrupled the recipe to better fit these containers. After 10 minutes or so in the refrigerator, you just take it out and boom: you have your own lead free, low priced, quality lipstick.


These are some of the colors that we made. We prefer lighter colors, but the darker colors show up well and may suit your taste. Here, I am wearing the "Poppin Pink" and my mother is wearing "Mamacita Mango." It's optional to name your colors, but I think it's a ton of fun and enhances the experience. I hope you had fun making your lipstick.
You can find out here if your lipsticks contain lead.

DIY Microdermabrasion

Years ago, I attended my first ever Mary Kay party and absolutely fell for the microdermabrasion product.  I loved the feel of those tiny granules in my palm and couldn't believe how smooth my skin felt afterward.  Flash forward a few years to the present.  In my efforts to live a more frugal and natural life, it's hard to justify the price tag for such beauty products.  Luckily, I only have to look as far as the kitchen cabinet for a nice substitute for the Mary Kay product I loved.
Baking soda's texture is just abrasive enough to make it a great microdermabrasion alternative.  I use it in the shower where I keep a small sour-cream-sized tub of baking soda.  I suds up my face with my normal face wash and while it's still on, I dip my wet fingertips into the baking soda.  It sticks, of course, and in just the right amount for one use.  In a circular motion, I then buff away dead skin by adding the baking soda to the water and cleanser that are already on my skin.  There's no need to scrub vigorously, just keep the granules moving for 30 seconds or so, and they'll have done their job.  Rinse thoroughly (otherwise BS can be pretty drying), pat dry (when you get out of the shower) and follow by your favorite moisturizer. 

Beauty treatments don't get much easier or cheaper than this!  Give it a try, and I'll bet you'll fall for that smooth-skin feel, too. 

Experiments with the Laundry Line

In keeping with this week's Lenten Observance, I've rigged up a temporary clothesline to put to use.  If all goes well, I may erect a more permanent one later.
Here are some thoughts on the project thus far:
1.  Obviously (as pictured above), I didn't have the line taut enough at first.  Girl 1's jeans were dragging the ground!  I re-rigged it and now have a much more efficient line. 

2.  The current location is both good and bad:  I like that it's right outside the kitchen window so I can see the clothes easily from the house (and know, for example, when a cat has pulled down a towel and is using it as a bed), but one side of it doesn't get good sun until the afternoon because it's so shaded by the house.  I may have to rethink the location for a more permanent line.
3.  What to do with the skivvies?  You see, we live right next door to church -- and not just any church -- OUR church.  While our laundry is not viewable from the road, it is viewable to anyone who pulls into the church parking lot.  I have this fear that Girl 2 will walk into Sunday school and hear from a friend "I saw your 'Sunday' panties on the line this morning.  Shouldn't you have them on today?" 
4.  What to do with John's dress shirts?  I pretty much only get out the ironing board when I'm working on a sewing project.  I pretty much only work on a sewing project when Little Boy is sleeping.  Come to think of it, he may not even know what an iron is.  This has been made possible by John's choosing non-iron dress shirts and my refusal to buy anything for myself or the kids that requires ironing.  But, the non-iron dress shirts require the dryer to get them in perfect shape.
5.  Even with these hindrances, I've found that I'm able to drastically cut back on drying.  For example, yesterday, I washed 3 loads total.  As they came out of the washer, I tossed the undies and dress shirts into the dryer and carried everything else outside.  So, I washed three loads but only dried one in the dryer. 
6.  Even though it's cold, the clothes do get dry.  I wasn't really sure about this.  Obviously, if it were below freezing, this wouldn't be the case, but on a breezy but cold day, I can put clothes out mid-morning and bring them in late-afternoon.
7.  I DO enjoy the additional outside time hanging the clothes allows me.  I chat with the goats and chickens, and watch Little Boy run around.  I expected to enjoy this part of it, but I was surprised by how much I enjoy bringing some of the outdoors in.  As I was washing my face with a washcloth fresh off the line, I found myself deeply breathing in that fresh outdoor smell.
8.  I DO NOT like how Milkshake, our smallest kitten, keeps jumping into the laundry basket full of wet clothes while I'm working.  This morning I counted 8 times that I had to toss her out of the basket.  Suggestions?

Coconut Oil Hair Treatment

Okay.  I would like to begin this post by reminding you that I do sometimes have good ideas.  Right?

I wanted to establish that because part of the way I employed this hair treatment was NOT a good idea.  I freely admit it.
While I was "washing" my hair using baking soda, I noticed that my ends got overly dry.  To combat this, I decided to try a homemade hair treatment that I read about in Mother Earth Living.

To make it, as I did, you'll need  . . .
2 Tbs. coconut oil
2 Tbs. honey
1 large egg yolk

If oil is solid, warm it over low heat until melted.  Then, whisk in the honey.  Once combined, whisk in the yolk. 

It will look like egg, but, thankfully, it smells more like the honey.
Apply it to dry hair, massaging well into your ends.  I ran a pick through my hair at this point to be sure that I had the goo evenly distributed.  The directions I had said to cover with a shower cap for "as long as you can."  If you can stand it, you may even sleep in the shower cap (be sure to cover your pillowcase with a towel in case of leakage).  To help the oils penetrate, you could apply some heat.  Maybe forgo the shower cap (it might melt) and use a thin towel instead as you sit under a hair dryer with a diffuser. 

It's at this point in the process that I had the bad idea.   I still needed to fit in my run for the day.  Little Boy was about to go down for a nap.  Hey!  I could borrow Girl 1's Turbie Twist (see below), wrap my gooey hair up, run on the treadmill, and thus generate the heat needed to really activate the oils and help them penetrate.

Click on photo to visit the product page on Amazon.com

So, I ran 3 miles or so on the treadmill with my hair covered in oil, honey, and egg.  (As I'm typing this, I'm wondering what in world would make me think this was a good idea.)  What smelled like honey as I put it on my hair, started to smell more like scrambled egg around mile 2.  Thankfully, the Twist absorbed most of the sweat and hair run-off, so that I didn't have any yellow smears on my sweat towel during the run.  That probably would have sent me over the edge. 

And, no, I will not show you any photos of myself running with a Turbie Twist on my head.  You'll just have to use your imagination.

Okay, enough about my bad idea. 

Once you can stand it no longer (or just need to move on with life), jump in the shower and rinse out the goo.  Then, wash as usual. 

Despite the cooking egg aroma surrounding my afternoon run, I think the hair treatment did a great job.  It left my hair surprisingly soft, and I definitely plan to use it again (maybe on a cross-training day).

BS Shampoo

Did that title get your attention?   Apparently, in homesteading circles baking soda and other frequently used items go by their initials.  As in, I've been washing my hair with BS and ACV.  Yep, baking soda and apple cider vinegar. 

You've probably heard of this increasingly popular "No Poo" concept.  The idea is that traditional shampoos strip our hair of their natural oils, requiring heavy-duty conditioners to try to restore needed moisture.  The idea here, is that you don't really wash your hair.  The baking soda absorbs and removes excess oil from the scalp without stripping the hair shaft of its natural oils.  Supposedly, you can go much longer between washes once your hair adjusts to this new process.


According to my research, you should expect a 2-week adjustment period while your hair figures out how much oil it needs to be producing with this new system.  Most users cite frequent ponytails during this period (not an option for this short-haired chica).  Nevertheless, I pressed on for 3 and a half weeks before throwing in the towel. Yep. That's right -- I gave up.

Last night, I washed my hair with actual shampoo and conditioner and now I just can't stop touching it.  It actually feels like hair again instead of the straw I've been wearing around on my head for the better part of a month.

I'm sure that it's a great option for some people, and I may even give it a go again sometime.  But, for now, it's just not worth it.  The good news is that I tried it (at least I didn't just dismiss it without giving it a go) and, in the process, I learned about a great,all-natural deep conditioning techinique (you'll have to check back tomorrow!).

I attribute my BS failure to the following:
1. My hair is color-treated and thus tends to be drier than the average hair.
2.  I run (and sweat) at least every other day.  The sweat adds increased oil and requires me to wash after every run.  Therefore, I was never able to enjoy the supposed prolonged period between washes that so many BS users enjoy and was having to make use of the drying baking soda more frequently than is recommended.
3.  My hair is short.  Perhaps if my hair were longer and I could have swept it up into and out-of-sight-is-out-of-mind ponytail, I might've eventually found a balance and made it out of the weird straw-hair phase.  I don't know.
If the No Poo method sounds intriguing to you, despite reading about my failure with it, check out this blogger that I read to see how she went about it. 

As for me, I plan to take a stroll through the all-natural hair care section of Whole Foods on my next trek to the big city and see if I can't find a better option.  Does anyone else use an all-natural shampoo/conditioner that you'd recommend?

The Crazy Lady with All That Apple Cider Vinegar

At the store recently, I noticed a quizzical look on a fellow shopper's face as I piled multiple gallons of vinegar into my shopping cart.  What in the world could I be using ALL this apple cider vinegar for? 
Well, just today I used it to clean and disinfect eggs brought in from outside.  I also used it as a hair conditioner (the smell is gone by the time you're finished with the hair dryer).  I've also been adding a shot of it to my grapefruit juice in the mornings (it's said to have multiple health benefits, including helping to rid the body of toxins and lowering blood pressure).  And, we add it to the chickens' water periodically to keep them healthy.
Then, of course, there are the more traditional uses, such as pickling.

I also tend to pile the baking soda into the cart.  We make baking soda available to the goats (it eases stomach bloat).  Of course, I use it as a soft scrub for cleaning.  The other night as I got ready for bed, I noticed that I'd used it three times in the span of 10 minutes:  to exfoliate my face, wash my hair, and brush my teeth.  Oh, and I use it for baking occasionally, too.  ;)

If I you're thinking about taking on a more natural approach to household products, I'd definitely suggest building a stockpile of these two plus probably some white vinegar, olive oil, washing soda, and Borax.  I've found it's amazing how many cleaning/toiletries bottles I can toss because they've been replaced by different mixtures of these simple ingredients. 

Make Your Own Lotion!!

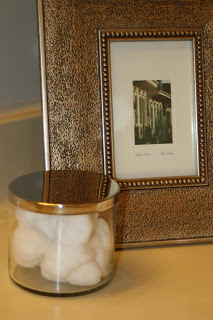
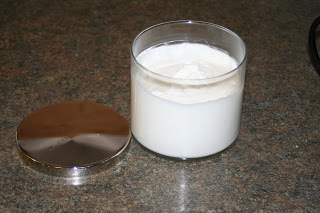
Remember this beautiful candle jar from yesterday's post? 
You could use it any number of ways. 

I decided to fill mine with some of my homemade, all-natural lotion (I've been going through it like crazy this winter!).

Believe it or not, this is really a very simple process. 


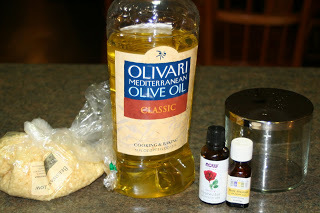
Here's what you need:

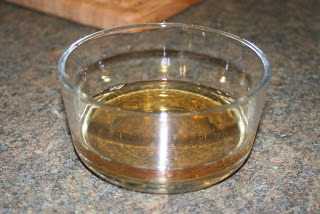
1/2 c. olive oil (not extra virgin)
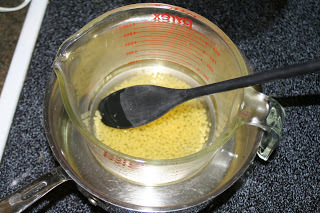
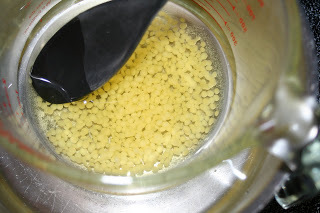
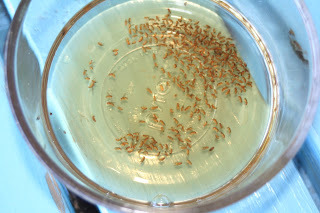
2 Tbs. beeswax
(I use the little pearls because they melt well.  They can be purchased any number of places.  I order mine from Brambleberry, which is where I get all my soap/lotion supplies.)
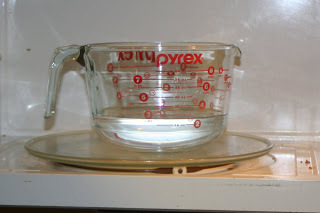
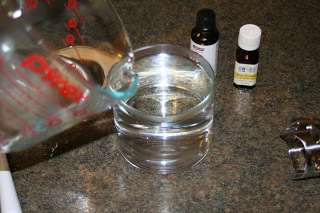
1 c. tepid water, filtered or bottled
10 drops or so of essential oil
(I used Rose this time, but it's up to you.  Choosing your own scent is the fun part!)

This recipe will make about 1.5 cups of lotion.  Test your jar to be sure it'll easily hold that volume.

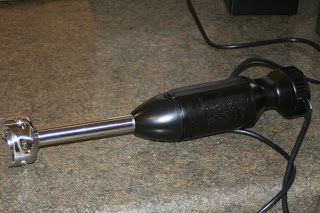
Also, to make it the way I do, you'll need an immersion blender.

Ready?  Here we go!

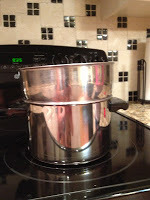
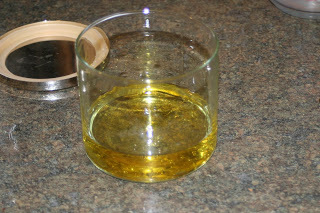
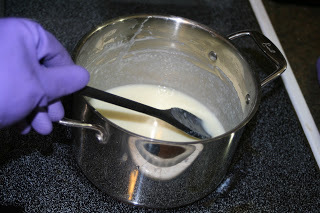
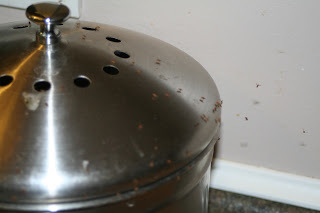
Combine your olive oil and beeswax in a double-boiler.  I used a makeshift one, a measuring cup balanced in water-filled pan.


Stir over medium heat until beeswax melts.


Meanwhile, fill your jar with VERY hot tap water.  We have our water heater set so that it doesn't get very hot, so I heated about 2 c. of water in the microwave then poured it into my jar.  This is not the water that'll be apart of your lotion; you'll actually pour this water out before filling the jar with the lotion ingredients. 


If you're one of those people who needs an explanation for everything, we're using the hot water to warm the jar.  If the jar is cool, the beeswax will reharden too quickly once it gets poured in. 

Once your beeswax has melted, act quickly. 
Dump out the hot water.
Pour in the oil/beeswax combo.
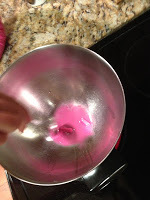
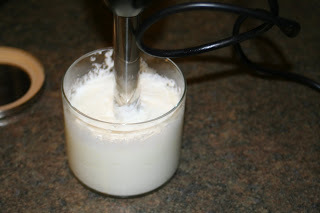
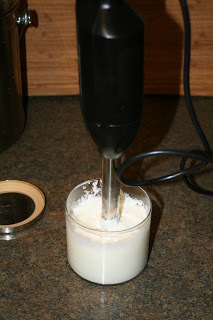
Add your essential oil.


As you blend, slowly pour the tepid water into the oils.

And blend.  And blend.  And blend.  And when you think, "Surely Ashley didn't mean that I should blend this long!" you might be half-way there.

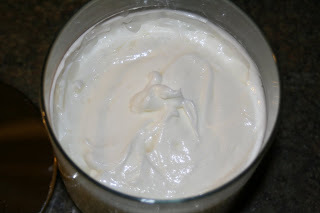
You'll know you're finished when you give it a stir and can't see anymore unincorporated water.

Give the rim of your jar a good wipe down so that it looks pretty.

Allow it cool completely before putting the lid on.  If, as it cools, you notice some water on the surface, just pour it off and make a note-to-self that you probably should have blended longer.

Yum!!  This really is the most amazing moisturizer!

Now, some other good things to know.

1.  You do not have to make it in the storage container.  Another option is to make it in your blender then "pour" it into storage containers.  But, be warned:  the mixture is so thick that you'll have to do a lot of scraping down the sides as you work.  And, it may not pour well.  Also, the oil and wax combo is not easily cleaned up.  Making it in the container saves a lot of cleanup. 
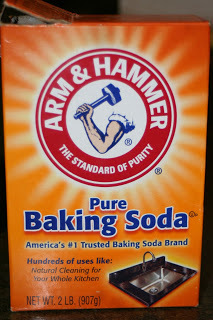
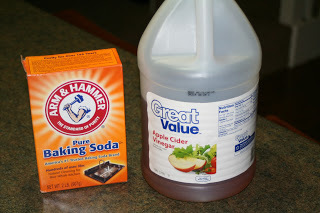
That said, rubbing the oiled containers down with straight dishsoap before using water to wash them out seems to work pretty well to get tools clean.  Also, baking soda works to absorb the grease.

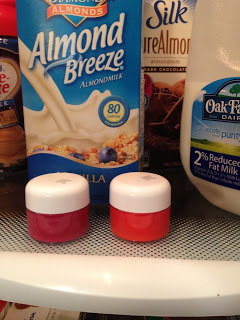
2.  This is an all-natural product made without artificial preservatives.  It should be stored at room temperature.  It should last a few months without going bad, but if you don't think you can possible use this much lotion in that amount of time, put some into another cute container and give it away to a lucky friend.  Signs that it may be past its prime include texture or color change.

3.  Making It, the amazing book this recipe comes from, suggests that this makes a good make-up remover/cold cream.  I personally have very touchy/oily skin, so the idea of slathering on an olive oil lotion makes me cringe, but if you have dry skin, this could be a good option for you.  I know that my sister has also used this lotion on the dry ends of her hair.

The first time you make this, it may take you awhile as you navigate the directions.  But, once you've made it a few times, you can turn out a batch in less than 15 minutes.

Please let me know if you decide to give this a try!

Soap Safety

Everytime I don my gloves and goggles to whip up a batch of soap, I feel like the biggest goober.  (Sorry, no goggle pics in this post;)

But, today, as I splashed my milk/lye mixture onto the lens of my goggles, I was thankful that I'd chosen to follow protocol.  My soap-making book advises covering every possible inch of skin, with long pants and long-sleeves tucked into gloves. 
The last time I made soap, I took my gloves off mid-process for a minute to do something out of the kitchen.  When I returned, I grabbed the spoon to continue stirring, forgetting to don my gloves first.  Ahhhh!  Yes, lye will burn you!  And, like a moron, I was wearing shorts (what can I say?  I'd made soap so many times without incident that I was starting to get comfortable) and proceeded to splash a little bit of the mixture out of the pot and onto my leg.  Chemical burns are no joke!
Anyway, I was very thankful that I was wearing my goggles today.  (For those who know me best, the splash was on the left lens of my goggles, but still ;)

So, if soap-making is in your future, don't play around with the safety guidelines.  All the warnings on the bottle of lye are there for a reason!

Can Goat Milk Cure Pink Eye?

Can goat milk cure Pink Eye?
Razz looks a bit skeptical.

This past week Jen, a good friend and blog reader forwarded me this Pinterest link.  Basically, the claim is that a few drops of probiotic-filled raw milk will clear up Pink Eye faster than you can make an appointment, get to the doctor, and pick up your prescription.

According to the site, "If the Mom in your household happens to be breastfeeding, a drop or two of breastmilk expressed into a cup and then applied with a clean eyedropper to the infected eye will rapidly and magically eliminate the infection. Reapplication may be necessary every hour for a few hours, but in most every case, the infection will be gone well before you could have even gotten an appointment to see the doctor."

If no breastmilk is available, the site recommends raw (unpasteurized) cow or goat milk.  Unpasteurized milk is not sold in stores and is illegal to sell at farmer's markets in Arkansas.  The only place to get it is from the producing farm. 

Now, does it really work?  I don't know, because (knock on wood) no one in my house has Pink Eye.  But, if someone in your house has it or develops it, I'd be more than happy to supply the milk for you to test this out.  I just love a good science experiment, don't you?

Thanks, Jen, for thinking of me and forwarding the link!

Fruit Fly Infestation

Okay.  I thought long and hard about whether or not to blog about this.  I mean, some of you may never eat another thing produced in my kitchen after seeing these pictures.
In the end, though, I decided that I really do want this blog to be an honest portrayal of life on our little plot of land, so here it goes. . .

I was gone pretty much from Wednesday to Sunday of last week.  That doesn't happen often.  Anyway, when I got home Sunday night, the compost pail looked like this. 

Fruit flies everywhere!

Okay.  Before you pass judgment and decide that I'm a terrible housekeeper to allow my home to get completely overrun like this, I offer a few pieces of info in my defense:

1.  I left the house in great haste.  So, I didn't empty the compost pail before I left. 

2.  I do my best to keep our kitchen clean, but our kitchen is a REAL, working kitchen.  If yours is too, then you know what I mean.  The fruit on the counter is real, not fake, and sometimes it attracts flying insects.  I cook 3 meals a day, almost everyday, so there's almost always something in process to attract critters.  Try though I might to keep it clean, there's just nearly always something happening in there, and it seems the flying fellas have caught on.

3.  We juice fresh fruit and veggies every morning.  When I left on Wednesday, I'd planned to be home  by Thursday afternoon. I'd left a bowlful of pears sitting out so that they would ripen to perfection in time for Friday morning's juice.  But, then things got crazy and Friday turned into Sunday, and one pear was rotting in the bowl and serving as a veritable fruit fly breeding ground.  Yuck!

Anyway, something had to be done, and since we're talking about the kitchen, a nasty pesticide spray was not the way to go.  A quick Google search turned up lots of all-natural ways to kill off fruit flies.  I decided to try these two:


1.  Add apple cider vinegar to a small bowl and drip a few drops of dish soap on top.  Apparently, the vinegar attracts the fruit flies and the soap keeps them from being able to escape.


2.  A bit more complicated, this one uses apple cider vinegar as an attractant as well.  I'm not going to go into great detail here about how to construct it because overnight, it caught only 2 fruit flies.

Meanwhile, the vinegar/soap trap looked like this in the morning light.  Wow! I'd say this one worked.


September Giveaway Time!

For this month's giveaway, I thought I would do my all-natural laundry detergent. 

I've been especially thankful for the money it saves me lately.  It seems that I am washing more clothes lately than ever before.  Take Girl 2 Wednesday -- she wore one outfit to school, a second one to tumbling class, and was about the change into a 3rd before an evening jog with daddy when I convinced her that she could just jog in her leotard (and shorts, of course).  Or, take Little Boy who is exceptionally excited about his new-to-him tennis shoes and wants to wear them all the time.  We take our shoes off when in the house.  He's got super-sweaty feet, so he doesn't want to put wet socks back on everytime he's ready to go back outside.  All this means that he may go through 4 pairs of socks a day.  (I know I could fight him on this, but I'm just so excited that he's mostly putting the socks and tennis shoes on by himself.)
The basic recipe for the laundry detergent uses these basic ingredients.  You could easily whip some up for yourself.


What makes my mix special, though, is that I don't use Ivory or some other ready-made soap.  Instead, I use soap shavings from my very own Coconut Laundry Soap.  This substitution to the regular recipe makes the laundry soap 100% all-natural and fragrance-free.

Whoever wins this month's drawing will receive a sour-cream-sized tub of laundry detergent.  At 2 Tbs. per load, it ought to last awhile!

So, how do you win?

I need some great CrockPot recipes for fall!  Fall means extra-curricular activities are back in full swing for our brood, and some of our weeknights are downright crazy around here.

Tuesday:  5:00-7:00 (including travel time) soccer practice for John and Girl 2
6:15-7:00 Hip Hop class for Girl 1

Wednesday:  3:30-6:15 dance team, jazz, tap, and tumbling for Girl 1
5:45-6:15 tumbling for Girl 2

Thursday:  5:00-7:00 soccer practice for John and Girl 2
5:30-6:30 ballet for Girl 1

What in the world will we do when Little Boy starts having evening activities, too?

Anyway, all this means that sometimes I am shuttling kids around during the time I would otherwise be prepping dinner and/or that we eat in shifts.  CrockPot meals solve both problems. They make it possible for me to be out of the kitchen in the hour before dinnertime and keep the meal warm for those who have to eat dinner at the later shift. 

And, yes, those of you who know me, I am saddened by the fact that we don't get to sit down together for dinner everynight anymore.  I guess we're entering a new season; at least we still get to have breakfast together.  Not having dinner together, though, means that important business, like our vote on what we're going to be for Halloween, has to be tabled until we can all be together.  (Yes, it's a very democratic process and a very big decision that we don't take lightly around here. :)

So, submit a CrockPot recipe or link to a recipe that you've tried out, and you'll be entered in the drawing for the laundry soap.

Please respond by Monday to be entered in the drawing.  Thanks!