Brooding On

Greywater Solutions

First off, let's define greywater for those of you who may be unfamiliar with the term.

"Greywater is wastewater generated from domestic activities such as laundry, dishwashing, and bathing, which can be recycled on-site for uses such as landscape irrigation and constructed wetlands. Greywater differs from water from the toilets which is designated sewage or blackwater to indicate it contains human waste."

Thank you, Wikipedia.  Green and sustainable houses can make great use of greywater, but these systems are typically much easier to install as a house is being built.  Adding the plumbing necessary for greywater systems that take full advantage of shower, laundry, and dishwashing water is difficult once the house is already established. 

There are, though, some other ways to make use of greywater.  One of those ways is with the AQUS.  This very cool system is affordable at just $200 and supposedly easy to install.  The system hides under your sink and reroutes the water that goes down the sink to the toilet.  Once the water reaches the toilet and is flushed, it leaves the house through your existing plumbing system.  This is a great option for those who'd like to make better use of greywater but aren't planning a new build anytime soon.

We've got the AQUS on a wishlist but haven't yet tried it out ourselves.  We are, however, taking advantage of greywater in one of the easiest ways possible. 
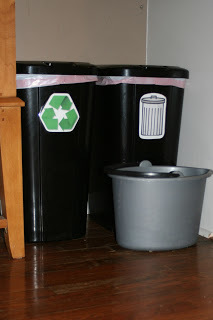
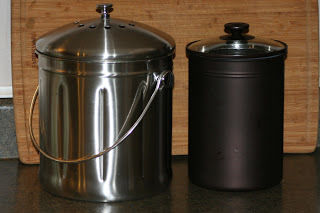
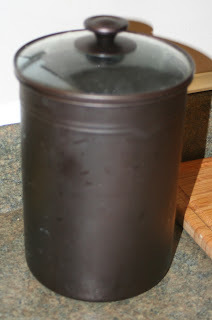
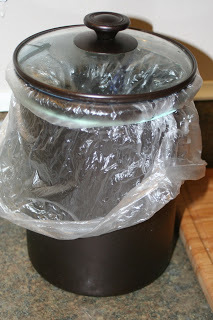
See the grey bucket? 

I realize that this solution isn't for everyone.  Not everyone could tolerate a bucket on the floor, but it really doesn't bother me and just sits right next to the trash and recycling cans.  Anytime I have extra water involved with dishwashing or the kids didn't drink all their water at dinner, etc., I just pour the water into the bucket.  When the time comes, I then tote the bucket outside and use it to water all my potted plants on the front and back porches.  Blossom, our inside cat, is a fan, too.  She thinks it's her very own giant water bowl. :)

This Month's Giveaway: Peppermint Shampoo Soap


Yep, it's giveaway time again! 

This month's winner will receive a bar of all-natural, homemade Peppermint Shampoo Soap. 
This soap would make a great gift for that man in your life (maybe even for his Christmas stocking). 

Why shouldn't you keep it for yourself? 

1.  It's best for short-hair because you can scrub it directly on your hair to work it into a lather (longer hair would tangle terribly if you tried this). 
2.  It's a bit harsh for color-treated hair.  I used it, and I think it stripped my color (oh, don't act surprised, you aleady knew I color my hair!)
3.  The peppermint scent is great for men as well as women.

That said, if you have short, non-color-treated hair, go for it!  It's a great soap -- you won't be disappointed!

So, how do you get entered to win?  Comment on this post by Friday in answer to this:

We've recently been given some venison, specifically a roast and some ground meat.  Since John doesn't hunt, venison has never before found its way to my kitchen, but I am eager to try it (as it was free to us and, in its way, local).  Help!  Recommendations?  Do you have a good recipe for either the roast or the hamburger?
 (Oh, and since I love my CrockPot, if you can give me a recipe for the deer meat that uses the CrockPot, I'll put your name in the drawing twice!)

Thanks in advance for your responses!  I'll plan to post the winner Saturday.  :)

Soap Trial and Error

Over the past several months, I've tried my hand at several different soaps.  Some have turned out better than others.  (The supposedly rose-scented soap that turned out to smell of licorice comes to mind, for example.)  Today, my little helper and I tried out a new recipe that I'm hoping will be a success.  It uses goat milk yogurt (which I always have plenty of) in combination with oils that are less expensive and more readily available than some that I've had to special order in the past.  If this recipe turns out to be as luxurious as I hope it will be, it'll be a good one for us to sell. 
Notice the gloves and goggles.  We play it safe when dealing with lye!

Now comes the hard part -- the 4-week-long wait before we get to test out a bar!

Compost Bin System is Complete

Lovely, isn't it? 

It's definitely not the most high-tech compost bin, but it gets the job done and cost us nothing.  We acquired the pallets a couple at a time.  In fact, the system began with three pallets, encompassing just one pile.  Last night, John affixed the last two pallets to make it a 3-bin system made up of 7 pallets all screwed together.  We figure this is all we'll need to keep us in year-round compost. 

The far-left bin is the newest.  All it has in it right now are the clippings from the squash plant that I cut away this morning.  This will now be the bin we fill with dryer lint, vegetable scraps, chicken poo, garden trimmings, etc. 

The middle bin has just been sitting for 4 months or so.  It is ready-to-use compost.  When we need to add some to the garden, we just scoop it out of this middle bin.

The far-right bin is the one we had been filling up (until yesterday).  Now, it will be allowed to sit and decompose for the next 4 months or so.  We will turn it periodically and be sure that it stays moist to speed decomposition. 

So, now that we have all three bins in place, the functions just rotate.  In 4 months, the far-left will be full and will become the one that is in the process of decomp, the middle will be empty and ready to be filled up, and the far-right will be decomposed and ready for use.

And the Winner Is . . .

And the winner is . . .

Jessica Anderson!
Congratulations, Jessica!  I'm actually going to be sending you two of these jars because they're so small.  So, one for you.  One for a friend.  Or, two for you.  Should you choose to keep them both for yourself, I won't judge.  I do, after all, LOVE this stuff!  It is all-natural and made by yours truly.  Enjoy!  If there are any sore losers out there, who just don't think they can go another day without this Rose Butter, send me a message, and we'll see if we can't work something out!  :)

It's That Time Again!

Yep, it's giveaway time!  This month, the giveaway is a jar of homemade Rose Butter.  It's an all-natural, rose-scented, thick body cream.  (Sorry, I don't have any pics right now because I just gave away my last jar and will be making more this week.)  It's perfect for dry skin.  If you don't tend to be dry, you may want to hang onto it until this winter when cold weather and heaters start to take their toll.  I like to use it on my arms and legs right after the shower.  In fact, it'll go further and absorb better if you apply it to slightly damp skin.

So, to be entered into the drawing, you have until Friday to comment on this post and answer the following question:

Of all the various posts you've seen here on Brooding On over the past several months, what has been your favorite?

To refresh your memory, check out the right sidebar for topics covered here on the blog.  If you can't point to a specific post, then at least mention what type of posts you enjoy most.  I'd like to know what's most popular with my readers so that I can be sure to include more of that type of thing.  :)  Also, if you have questions about our little farm or would like to see a post on a certain topic, feel free to add that request to your comment. 

I look forward to your comments!  Check back Saturday to see who the lucky winner is!

Truly All-Natural Laundry Soap!

Though I've been making my family's laundry detergent for quite awhile, even using Ivory soap doesn't make it completely natural.  Once I began soap making, I set out to create an all-natural soap especially formulated for laundry. 

This Coconut Laundry Soap is all-natural and is formulated differently than body soap (making it much better for laundry use than Ivory).  It contains Coconut oil, which lathers and cleans well but will not build up on fabric and rinses away better than traditional soap during the wash cycle.  This soap is suitable for vegetarians and vegans and is handmade by yours truly.  :)


Since this is a product that is not easily obtained in stores and I've made more than I necessarily need, I'd love to make it available to you via the blog.  If you'd like to order one of the 3 products listed below, please email me (Ashley) at bellerbrood@yahoo.com.

I will sell this soap in 3 different forms:

1.  Baggie of Shredded Soap.  If you plan to add the soap to your own laundry mix, this just saves you a step.  This amount is enough to mix with a full box of Borax and Washing Soda to create enough detergent to last you months. 
$5.00 + cost of shipping (if applicable)

2.  1 qt. jar of prepared laundry detergent.  If you haven't yet tried homemade laundry detergent, this would be a cost and resource-effective way to try it without a big commitment.  This jar, containing a mix of Borax, Washing Soda, and my Coconut Laundry Soap, is ready to use and since it takes only 2 Tbs.-1/4 c. per load (depending on your water), it should last you long enough to decide whether you'd like to continue using DIY laundry detergent.  In fact, this one jar should last about 30 loads.
$3.00 + cost of shipping

3.  Bar form.  This bar is 2" in diameter.  It can be shredded to add to your own mix of detergent or can be used in its bar form as a stain pre-treater. 
$2.50 + cost of shipping (if applicable)
(Available 6/27)

And the Goat Milk Soap Goes To . . .

Thanks so much to the 8 of you who made me smile with your comments!  It looks like strawberry and lemon pies are favorites.  Jenny, I love the frozen berry pie, too.  I think I may have made a dozen of them last summer.  I'll have to do a post on that recipe later on.  Ericka, I remember your warm strawberry cream cheese pie.  Yummmmm!  And, I'm anxious to try your frozen pie.  While I do love lemon, I've never made a lemon pie, so I'll have to give that a try as well; thanks, Merrilee, for the recipe for that one.

Now, for the big reveal.  John served as my witness for the big drawing   (Mom, do you recognize the 99 cent bowl you bought me from the antique store last weekend?  A little oil went a long way, huh?).

The winner is . . . Ericka!  Looks like I'll be mailing some all-natural, handmade goat milk soap to Texas!  I hope you enjoy it!

Who Doesn't Love a Giveaway?

I know you're out there.  The blog's stats show that I do have readers.  But, I can count the number of comments I've received since the blog's inception 3 months ago on my fingers.  But, I LOVE comments, dear readers.  So, like any good parent, I'm prepared to bribe you ;) 

I've decided that each month, I'll give away a product to one lucky reader.  All you have to do to get your name put in the pot for the drawing is post a comment, answering the question of the month.  Easy, huh?

This month, the winner will receive a bar of handmade unscented goat milk soap

This all-natural soap is great for all skin types and contains a combination of several oils in addition to the milk, which is so nourishing to skin.  It is suitable for both face and body.  Because this bar is unscented, you can use it in the shower, then follow with your favorite scents for lotions and sprays without their having to compete with a scented soap.

To be entered to win the goat milk soap, please comment on this post by Sunday, the 20th.  I'll post the winner on Monday.  Ready for your question?

As summer is approaching, my mind turns more and more to pie.  :)  I love a good, fresh berry pie like this one.  I'm assuming lots of you do, too, since this pie post currently ranks #4 in my most frequently viewed posts.  So, what's your favorite pie for summertime?  You may include the recipe in your comment or provide a link, if it's an online recipe.  I hope to hear from several of you (and be able to enjoy your wonderful pie suggestions this summer, of course.)

Happy Mother's Day to Me!

Among several other well-chosen gifts, this was one of the gifts I unwrapped on Sunday morning (my husband does such a good job!)  Has anyone ever been so excited about receiving a compost pail?  Apparently, John picked up on my not-so-subtle hint (click here for that post) that I'd love to have this pail.  He even got the exact model I'd linked to in the previous post.  I know, I know.  He's a keeper. 
Moving into it was almost as exciting as moving into a new handbag.  :)

For size comparison, here it is sitting next to our previous model.

So far, the charcoal filter in the lid is definitely doing its job, which is to keep odors in check.  Here, you can see it's got about a gallon-ful of orange pulp, coffee grounds, green onions, and more.  Still, you'd never know when the lid is on that it's holding all of that yuck!

I love that my husband knows me well enough to know that I'd rather receive a compost pail for Mother's Day than a vase-ful of flowers!

DIY Dish Detergent

I'm declaring victory!  I've finally found a DIY dish detergent that works well with our machine and water.  This has been no small feat.  I think I've tried 5 different combinations over the past several months.  All past trials have resulted in various degrees of film left on the dishes.  I recently discovered (Thank you, Sears repairman) that we have high amounts of calcium in our water that is causing build-up on our dishes as well as on the inside of our machine.  Most DIY detergent solutions just aren't equipped to deal with that much calcium. 
And, it should be said, I run my dishwasher A LOT!  We don't use paper plates; we all eat breakfast and dinner  here nearly everyday;  2 (sometimes 3) of us eat lunch here daily; our juicer parts take up significant space on the top shelf; and I'm not a fan of handwashing when I have a machine that will do it for me.  All of this means that I run our dishwasher at least twice a day.  So, having a dishwasher that does its job and does it well is a priority.  

This recipe is actually my own combination of several recipes I've tried. I've been using it now for about 2 weeks and think I've now got a good handle on the ideal proportions, so I'm ready to share it with you!

 
Here are the ingredients.  (Yes, that's rice you see.) You'll notice that it includes Cascade Complete, which is not a green solution. If you are looking to go entirely green with your detergent, this is not the solution for you.  However, I'm convinced that the green DIY solutions just aren't gonna cut it for my water.  This recipe allows me to use significantly less Cascade than if it were my primary detergent and, in the process, saves me lots of green (cash, that is).

I make a small batch because I have a small container and because I only have to use 1 Tbs. per load.  After all, this mixture will provide me with detergent enough for 64 loads.

Mix together the following:
1 c. Arm & Hammer Super Washing Soda
1 c. Borax
1 c. Cascade Complete
1/2 c. Lemi-Shine
1/2 c. rice

The skinny on the ingredients:
The Washing Soda and Borax naturally stretch the cleaning power of the Cascade Complete.  I always have these 2 ingredients on hand because I also use them in my DIY Laundy Detergent. The Lemi-Shine was recommended by the aforementioned Sears repairman and helps keep that yucky film off the glasses.  All of these ingredients are likely to solidify into one giant mass in my container, if left to their own devices.  The rice serves to absorb excess moisture and keep the mixture scoopable.  It's not a problem to have it in the dishwasher as it washes away during the cycle.

Mix it all together in container; throw in a Tbs. scoop and a label; and you're ready to wash.

The skinny on the savings:
At 20 cents per load, Consumer Reports considers Cascade Complete powder a real value.  After all, if you're using some of the new, trendy gel packs, you're paying more like 40 cents per load. 

This above recipe, however, comes out at just over 6 cents per load, a value unheard of on the supermarket shelf.

If you've never had problems with film, I'd give this mixture a try without the Lemi-Shine (which is the most expensive ingredient), and you'll save even more.  But, for those of you who, like me, are plagued with super-calcified water, give this recipe a try.  And, please report back.  I'd love to know how it worked for you!

DIY Deodorant

So, I tried my hand at some all-natural deodorant.  I have to say . . this stuff smells great!  I mean, if you whip up a batch of this stuff, you'll be sniffing the bottle continuously.  And, honestly, you may have to quit using it because you'll be constantly fighting the urge to sniff your delightfully scented pits in public.  ;)

Now, before you rush out and gather up all the ingredients, let's be sure we know what this is and what it isn't.
What it is= an amazingly scented deodorant that gets the job done (I'm not sure I'd rely on it if I were planning to have tea with the Dowager Countess after running a 5K, though).
What it isn't= an anti-perspirant.  So, if not pitting out your dress shirt during a big meeting is important to you (as it is to my husband), perhaps you ought to hold out for a different recipe. 

So, ready to proceed?
Here's what you need:
4 Tbs. olive oil (not EVOO)
1 Tbs. beeswax
1/8 tsp. tea tree oil
1/8 tsp. rosemary essential oil
1/8 tsp. lavender essential oil
empty, clean stick-typed deodorant applicator

Combine olive oil and wax over a water bath and heat the water to a gentle simmer.  Stir until the wax melts.  Remove from heat and add in the tea tree, lavender, and rosemary oils.

Roll your applicator down to its lowest position.  Add just enough hot oil to cover the platform and wait a moment while it cools slightly (some applicators have tiny holes in them -- this step will block the holes).  Add the rest of the mixture.  Let it cool and solidify overnight before capping.  Apply just like you would a store-bought stick.  Then sniff, sniff, sniff those pits a la Mary Katherine Gallagher.  ;)


1st Attempt at Goats' Milk Soap!

Sometimes I struggle with patience.  I know, I know.  It's something I need to work on.  So, here we are preparing our home for dairy goats, reading the soapmaking book cover to cover several times over, gathering all the necessary soap making supplies, and just waiting for our goats to be ready to come home.  Knowing that the soap would have to cure for at least 3 weeks before it's ready for use (and ready for me to see how it turns out / tweak the recipe), I decided to let my eagerness to begin get the better of me.  When I was in LR last, I purchased some goats' milk at Whole Foods.  Tuesday night, I gave it a whirl. 
Here are all my supplies, ready to go.  At the last minute, I couldn't find my safety goggles (a necessity when working with lye), so I used John's tinted weed-eating goggles.  I must have looked ridiculous, but I was so excited that I didn't care.

Here they are!  I used a silicone mold that makes these 3" diameter circles.  I think that's a good size to hold in the shower.  Also, I tried my hand at using a soap stamp.  I love the design, but I had no idea when I ordered it that it was so small.  It kind of gets lost in the middle of the bar.  I'll probably try to get a larger one for the next try. 

I will say that milk soap making was pretty intense.  I used a recipe that incorporates goats' milk, olive oil, cocoa butter, coconut oil, rice bran oil, and apricot oil.  For the first try, I didn't add any scented oils. This recipe is supposed to produce a hard bar that lathers well and has tons of nutrients and moisturizers for sensitive skin.

The pH levels tested great, so, chemically speaking, my 1st attempt was a success.  In three weeks, I'll get to give it a try.  If the bar goes soft too quickly in the shower, I'll allow additional curing time for the remaining bars.

Trial and Error

Meet my compost pail.  This little guy sits atop our kitchen counter, between the sink and the cutting board and holds all of our veggie scraps and other items destined for the outside compost pile.  As many of you know, we are learning this whole "homesteading" lifestyle as we go -- often from books and occasionally from conversations with others who have more experience.  However, "what type of compost pail do you recommend?" is not exactly a common soccer-field sideline topic and none of my books provided me much insight, so I'm offering you here a chance to learn from my own failure.

I bought a cannister from Wal-mart to gather our scraps.  It was cheap, holds about 3/4 gallon, and coordinates with our countertops, so I thought we were good to go.   The main problem can be seen in the top right photo (if you look very closely).  The screw in the middle of the underside of the lid is terribly rusted.  Why?  There's too much moisture in the pail.  Oh.  So, I guess it needs venitlation.  I tried leaving the lid off.  Oh.  It stinks and is a fruit fly breeding ground.

Also, how do you keep the pail from getting too nastified (is that even a real word?) in the bottom?  I tried the above method, lining the pail with a grocery store produce bag.  Suddenly, when I looked at my cute pail, carefully chosen for its coordination with my countertops, all I could see was a nasty plastic bag held in place by a rubberband.

Now, I'm doing this instead of using a bag liner, and it's working okay.  I put a handful of shredded newspaper in the bottom of the pail.  This absorbs some of the liquids and makes it easier to dump onto the pile.  I'm liking it, but there's still the rusty screw problem, so I'm still dreaming of the compost pail below.  (What?  You don't dream of compost pails?)


This little beauty (available at amazon.com -- just click on the photo to see all the product info) holds 1.5 gallons, so I wouldn't have to dump everyday.  Also, it features a charcoal filter in the lid that allows for ventilaltion but prevents odor from seeping out.  Also, it has a handle.  And handles are just, um, handy.
So, if you're considering adding a compost pail to your kitchen countertop, I hope you may be able to learn from my mistakes.  :)

Waste Not, Want Not

Today, as I was taking a shower and using my little mesh drawstring bag I made to hold the little pieces of soap that would otherwise be rendered useless, I was reminded of something I read lately.  An author was saying that she knew times were tough for her family when her mom sewed pantyhose bags to be able to make use of every last soap shard.  When I read it, I remembered thinking, "But what else would you do with the tiny pieces of soap?  Throw them away?"  I assume that's what most of us do. 

Later in the day, I found myself mending a hole Girl 2 tore in a dress that she wore to school last week.  (Whether or not the hole was ripped intentionally because of how upset she was that she had to wear a dress to school remains unknown.  I prefer to think that my sweet child is not capable of such malicious behavior, so we'll go with that.)  Once I'd fixed the hole in the dress, I searched my button jar for a button to replace the one on John's dress slacks that was broken by the cleaners this week and sewed it on.  This season, I've ironed on countless knee patches (Oddly, Little Boy is the only kid who's not yet donning patched jeans -- I thought boys were supposed to be the roughest on their clothes!?).

Mending clothing and using up every last bit of soap are nothing special.  But, in this consumer culture, many of us are guilty of putting those worn out jeans into the donate pile, or worse, the trashcan.  I want to fight back against that tendency and Waste Not.

I think my obsession with mending and reusing stems from our compost pile out back.  I've been amazed at what is compostable that I would normally throw away.  Things like shredded newspaper, coffee grounds, tea bags, and dryer lint are a few of the things I've been surprised to learn can be thrown onto the pile.  Who would've thought that I could re-purpose dryer lint, turning it into rich compost, that will turn into beautiful, nutritious garden-grown food for our family?

So, now I keep looking at things I might normally throw away and thinking "What else could I do with this?"  An empty spray bottle became the holder for my homemade hair conditioner.  Newspaper has become pots for starting seeds indoors.  The mesh bags that were the packaging for the bicycle knee pads and elbow pads the girls got for Christmas have been transformed into soap bags, like the one hanging in my shower.  Worn out washcloths have been sewn into reusable cotton pads I use for applying toner in my skin care regimen, and others were cut to size to fit my Swiffer mop perfectly.  Empty cardboard boxes have been broken down and will be used sometime next week as weed block underneath our new raised garden boxes.  The yogurt that was a couple days past date but still smelled just fine made a great treat for the chickens.  And the yogurt container -- who knows?   The possibilities are endless!

Between re-purposing, composting, and hauling things to the recycling center, our family of five can consistently fit a week's worth of trash headed for the dump into one 13 gallon kitchen-sized trash bag -- quite an accomplishment, if I do say so myself.

Perhaps this post can inspire you, too, to stop the next time you're about to toss a holey pair of pants, empty peanut butter jar, or yesterday's newspaper and ask yourself what else you could possibly do with it so as to Waste Not and Want Not.

New Uses for Old Things

"If you have ever wondered how to grow vegetables in an apartment, build a chicken coop, homebrew beer, or make you own soap from scratch -- this book is for you.  The essential guide to becoming a producer instead of a consumer, Making It is full of simple, ingenius projects for your home, your garden, and even your fire escape."  -- from the back cover of this amazing book by Kelly Coyne and Erik Knutzen who operate a "1/12 acre farm in the heart of Los Angeles."

I am loving this book!  It's full of natural alternatives to store-bought items.  Obviously, I'm still handicapped following my surgery, so I can't do any hard-core experimentation right now, but we've already tried out 3 alternatives with great results. 

1.  Dry shampoo -- If you haven't already discovered dry shampoo, you're really missing out, and I'm so glad to be the one to clue you in.  The idea behind dry shampoo is that it absorbs hair oils allowing you to go longer between washing.  If you know much about caring for hair, you know that washing (and drying) and heat styling your hair are some of the worst things you can do for it, so a dry shampoo allows you to do those things less often.  I usually buy my dry shampoo from Sally's for about $6 a can.  When my hair was blonde, I could get away with baby powder as an alternative, but now that I'm wearing my hair darker, baby powder leaves a grayish residue -- not a look I'm going for.  This book presents brunettes with a great option:  unsweetened cocoa powder!  Find it on the baking aisle.  I've tried it and am a believer.  I'm thinking I'll get a pepper shaker to put it in for easy application.
2. Zit cream.  I've become increasingly weirded out about putting creams on open sores on my body when the cream's packaging has a big warning label complete with the poison control hotline number to be dialed in case of ingestion.  Natural alternatives are preferable . . . as long as they really do work.  So, since I still have the problem skin of a teenager, I quickly had opportunity to try out honey as a zit cream.  True to the book's claim, when applied directly to the pimple before bedtime, I awoke to find the redness gone and the swelling reduced.  If you have long hair, you should probably tie your hair back before bed; otherwise you may find it matted with honey when you wake.  One cool advantage to using honey as a zit cream:  once you've applied, just lick your finger ;)  While that does sound kinda gross, it's nice to know that I could do that if I wanted to (it's probably best not to try it with my OXY 10). 

3.  Try olive oil as a shaving cream.  John tried this out last night and said it worked great.  Because the oil is natural, it doesn't clog pores and should be fine to use even on acne-prone skin.  Also, the lower-grade olive oil works just as well as extra virgin as long as it's 100% olive oil, so you can save a buck there.  The book suggested adding some scented essential oil to mask the smell of the olive oil if it bothers you.  I have an orange oil that I will probably try because it seems more masculine than the rose or lavender oil I usually use to scent my homemade cleaning supplies.  I haven't yet had opportunity to use this shaving cream because of my surgery.  I'm not supposed to bend at the waist at an angle less than 90 degreees, which means I'm not supposed to do things like put on my own shoes or shave my legs.  It means that I feel like the epitome of lazy when, like the other day, I dropped a hairbrush on the floor, looked at it lying there, shrugged my shoulders, and crutched away, leaving it just lying there (just like I would fuss at the girls for doing). 

Is your interest piqued?  Pick up a copy of the book.  These are just a few of the great ideas contained there!