Brooding On

Work Begets Work

Lately it feels as if every time I cross something off a list, another thing is there to take its place.  I just can't seem to get ahead.  

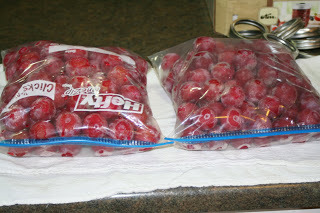
As I mentioned before, our half a cow will soon be on its way, so I needed to clear out some freezer space.  After a bit of work, I was able to free up half of this freezer and another fridge-top freezer.  Hopefully, that'll be enough space.  So, I can cross that project off the list.

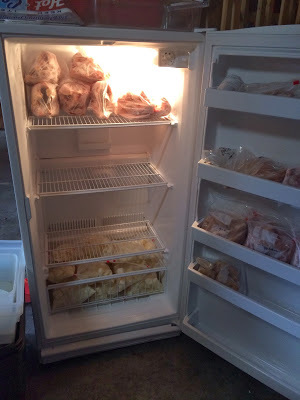
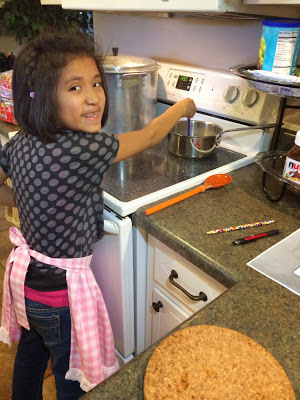
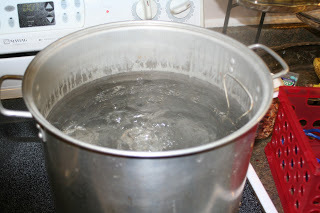
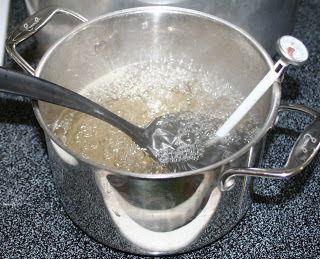
But, in order to create all this space, I needed to make some chicken broth.  

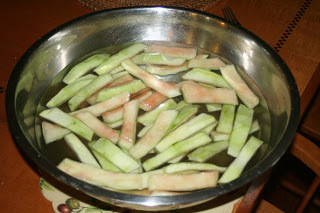
Often when I take a chicken from the freezer to the kitchen, it's just to make use of the breast, thighs, and legs.  I stick the rest of the carcass back into the bag and toss it into the freezer.  I do the same with leftover parts of celery.  


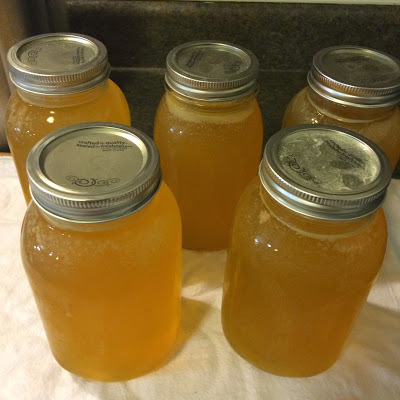
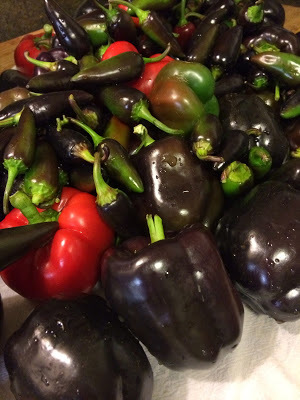
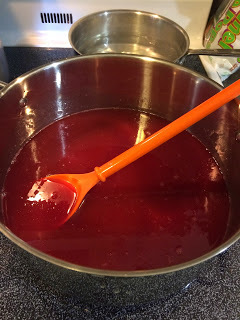
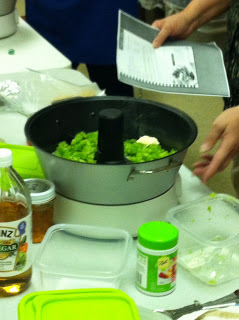
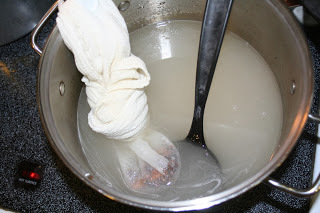
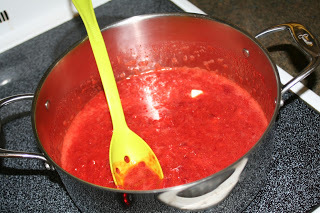
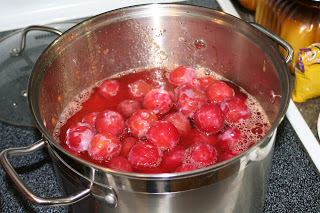
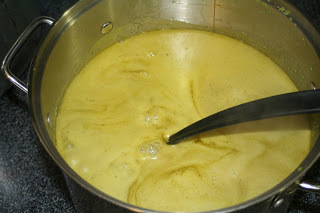
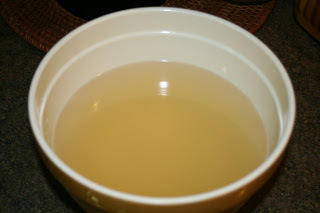
To make a batch of broth, I just throw in two carcasses, chopped celery, chopped carrot, chopped onion, garlic, thyme, parsley, bay leaf, and salt and let it all simmer for as long as I can stand it.  Yummm!

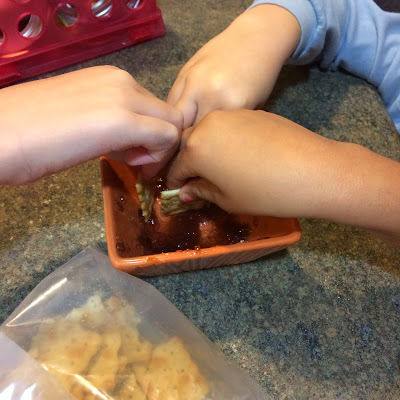
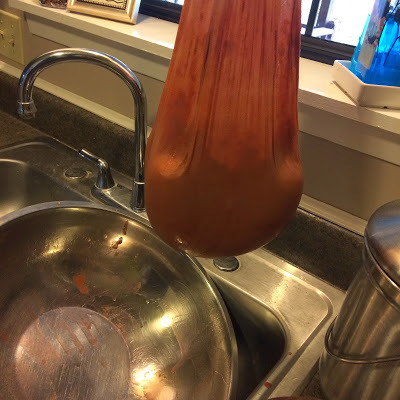
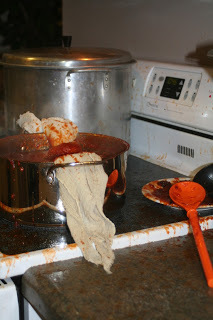
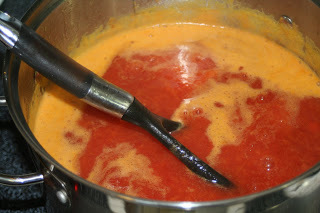
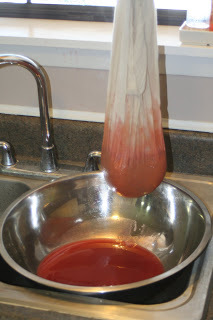
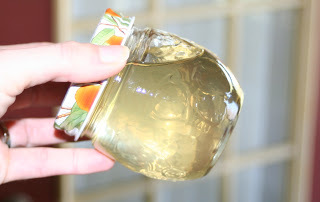
Once the broth has been strained off, I pick the bones of any meat that's leftover and store this cooked, shredded chicken in little 1/2 c. bags so that it's at the ready for chicken salad and the like.

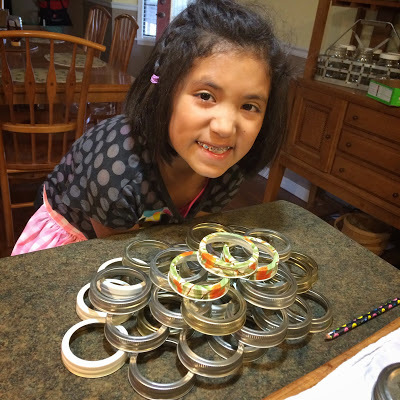
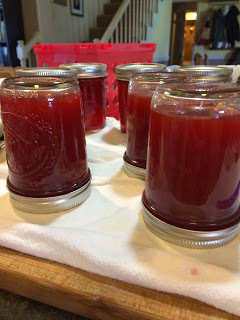
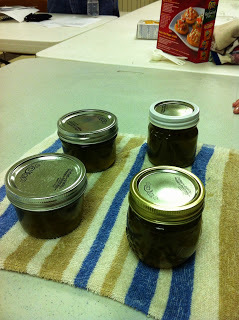
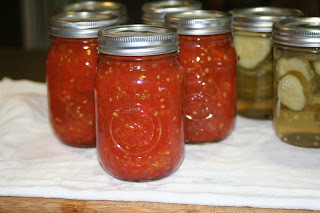
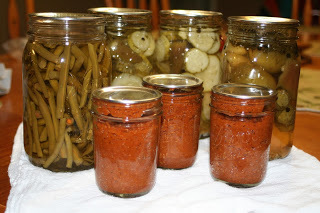
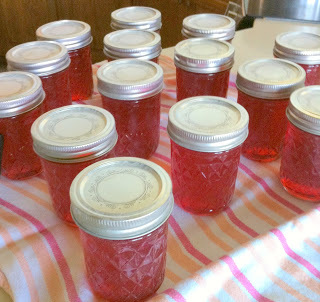
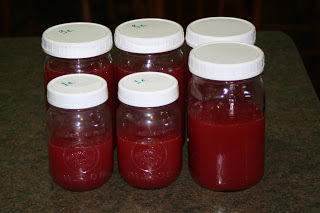
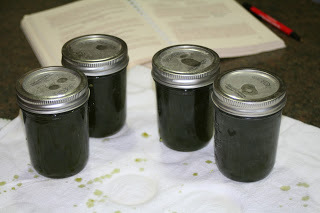
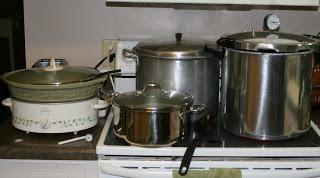
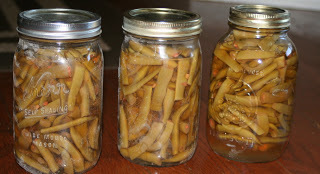
This is actually a great time of year for me to be making broth.  It's at the end of the growing season, so I'm able to make use of whatever jars aren't already occupied.  And, we're just now entering the season in which I use a lot of broth for cooking hearty winter soups or big pots of rice or beans.

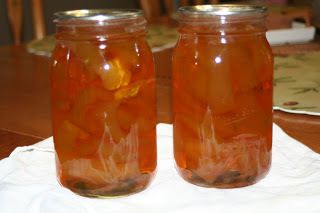
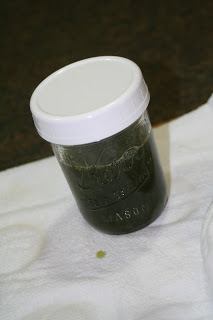
If you're looking to make use of your chicken leftovers and are thinking about making your own broth, you should definitely give it a try.  The finished product is so much more flavorful than anything you can buy at the store.  And, if pressure canning is out of the question and you don't have a 1/2 a cow headed your way, you can always freeze your broth in quart- or gallon-sized baggies.

Plentiful Peppers

Our first frost meant that I needed to harvest all those beautiful peppers that hadn't yet made their way to the table.  and ASAP.
 
We busted open a jar of pickled peppers that I'd put up a couple months ago to determine whether they were worth repeating.  Yuck.  Both the texture and flavor were less than ideal.
So, I decided to play it safe and make some more purple pepper jelly. 
 
When I picked the kids up from school, Girl 1 informed me that she had "easy" homework. "Great!" I tell her, "You can help me make some pepper jelly!"
 
Her response:  "Oh, ummm. Did I say easy?  What I really meant was . . . "
 
Luckily, Girl 2 was a much more eager helper.

 
She even created a ring pyramid.  :)

 
Of course, all 3 of the kiddos were fans of the finished product.

 
Girl 2 was so much help, I decided to reward her with a big tub of sour cream.  ;) 
 
This picture cracks me up.  Actually, we are trying to clean out the freezers a bit to make room for our half of a grass-fed cow that should be headed our way in the next couple of days.  I've got lots of individual servings of lime frozen yogurt that we've got to go through before the cow comes home. 


Jelly-Making Secret

Our canning club is careful only to endorse methods and practices that are USDA-approved.  But . . . I've heard whisperings.  At one meeting recently, we were making jelly and an older lady I was sitting by was surprised to see that we were putting the jelly-filled-jars into the boiling water bath at all.  "I've never done that, and my jars seal just fine," she whispered.  

What?  This went against everything I'd ever heard!  This would be BIG.  This would make jelly-making accessible to the masses.  The idea of "canning" is too big hurdle for some to get over.  But, what if all you had to do was bring the juice, sugar, and pectin to a boil and pour it into jars?  Would they really seal?  Would they be shelf-stable?
I didn't do anything to test the theory then, but I filed this experience away in my mind.  
Then, I came across a recipe for sugar-free jelly that RECOMMENDED not processing the jars in a canner.  Once the sterilized jars are filled with jelly to 1/8" from the top, you just twist on the lids and turn them upside down for 5 minutes.  Once you turn them back right-side-up, just listen for that wonderful "ping" that lets you know they've sealed.  

So . . . listen.   I tried it yesterday, and . . . 

lean in . . . .

(you promised not to tell, right??) . . . 

IT WORKED!

Every jar sealed beautifully.


I didn't love the particular recipe I tried, so I'm not reposting it today, but once I've got a good recipe to use with this, I'll let you know.  This sealing business is BIG news, guys, BIG news.

Jelly Making= Anger Management

I'm really not an angry person, but I was realizing as I punched, poked, and prodded this butter-muslin-turned-jelly-bag that if I were, jelly-making would be great therapy.  
This year, I wanted to try 2 different plum jelly recipes and would need 10 cups of juice to be able to make both.  

I extract plum juice the lazy way -- that is, I throw whole plums into the pot -- skin, pit, and all.  I add a cup of water, turn on the burner, and commence Therapy Step 1 as I wield the potato masher and punch and mash those plums to a pulp.

Once it's all boiled a few minutes, I pour it into the butter muslin and hang it over a giant bowl.  It dripped about 8-cups-worth, but as I said, I needed 10.  That's when Therapy Step 2 began as I punched, mashed, squished, and poked another 2 cups out of that bag.

Tomorrow, I'm going to let you in on a little canning secret that you have to promise not to tell the other members of my canning club.  It'll just be our little secret.  Promise?  


Thank you to those of you who noticed that I missed a couple of blogging days early this week.  That makes me feel so loved!  
As explanation, I offer this picture.  
Amazingly, my calendar held two pretty-much clear days, so I jumped at the chance to go visit these fun folks in Texas.  
I missed sharing my blog with you, but, what can I say?  I never pass up an opportunity to spend time with my sis!

Purple Pepper Jelly

Thursday night at Canning Club, we used jelly making machines to make pepper jelly.  I'd never even seen a jelly maker before!  
While I do NOT plan to add yet another piece of equipment to my kitchen set-up, I do appreciate how this piece simplified the jelly-making process.  


At the club meeting, I had a fun idea, though.  The recipe we used for pepper jelly called for bell peppers and jalapenos.  Both of those types of peppers have been prolific in my garden this year, and I've grown purple varieties of each.  How fun would it be to create Purple Pepper Jelly!?

The next day, Girl 2 and I set to work to create a purple jelly.  The color turned out beautiful.  The jelly was a bit thicker than I'd like, but it was definitely tasty!  This was Girl 2's first time to help with a canning project.  She seemed to really enjoy it:  "Mom, you've got to teach me ALL this stuff!  How else will I be able to teach my kids?"
:)  That kind of thing really does a mom's heart good.

Messy, Messy Ketchup!

If next year I start talking about wanting to can some more ketchup, please remind me that Heinz is just fine.  :)
A buddy from Canning Club told me that I'd never go back to store-bought ketchup once I'd tasted homemade.

And, yes, I'll grant her that if I were making a decision based on taste alone, she would be entirely correct.  This stuff is GOOD!  

She forgot to mention and thus factor in, though, the time involved and the MESS!  

My amazing hubby worked with me for the solid 5 hours it took for us to complete this project.  As it got later and later and neared midnight, I admit that I got a bit cranky about it all.  He persevered, though, and encouraged me, and we did (finally) get finished.  

Then, though, we had to begin the clean-up.  And, if I'm being honest, it's still going on. I keep finding sticky splatters in remote places.  And, even though the kitchen floor has been mopped twice, our shoes are still making that sticky sound when we walk across it.  :(

I'm guessing it was so messy because my pots weren't really big enough to accommodate the boiling goop, and it was so sticky because it contains about 1 cup of sugar PER PINT!  Wowza!  Still, it's got to be better for us than the high-fructose-corn-syrup-packed store-bought variety that currently inhabits my fridge door.  

It's Officially Summer -- I Canned Some Tomatoes


Finally, I had enough tomatoes ready at once to justify pulling out the canner.  I can't help but be reminded of this great tomato-canning quote I came across a few months ago:

"The only preserving I'm serious about is canning tomatoes.  I can tomatoes like a grandmother staking her hopes on fermenting vegetables and pots of boiling fruit.  I can enough to eat tomatoes grown nearby all through the icy northeastern winter, and give a jar to anyone who shows up looking peaked.  I do it as though my doing it will stop the summer from ending, and in a way it does."

from Tamar Adler's An Everlasting Meal

Pickled Watermelon Rind

Though I've never seen or heard of them before, pickled melon rind is apparently an old southern delicacy.  I realize these may not be for everyone, but they are actually pretty good.  AND, they make use of a part of the melon that even the goats don't want to eat, so that's super homestead-y (yes, that' s my new made-up word).  


To make them, you'll need . . . 
about 6 lbs. of watermelon rind
3/4 c. salt
3 qt. water
about 2 trays of ice cubes
9 c. sugar (yes, you read that right)
3 c. white vinegar
3 c. water
1 Tbs. whole cloves
6 cinnamon sticks, 1" pieces
1 lemon, thinly sliced with seeds removed

Day 1:  Using a vegetable peeler, remove the hard, green, outermost part of the rind.  Also, remove all the pink from the innermost part of the rind.  Cut into whatever shape you prefer (I cut mine into long, thin strips).  Cover with brine made by mixing the salt with 3 quarts cold water.  Add ice cubes.  Let stand 3-4 hours.  

Drain; rinse in cold water.  Cover with cold water and cook until fork tender, about 10 minutes.  Drain.

Combine sugar, vinegar, water, and spices (tied in a clean, thin, white cloth -- I used butter muslin).  Boil 5 minutes and pour over the watermelon;  add lemon slices. Let stand overnight in the refrigerator.

Day 2:  Heat watermelon in syrup to boiling and cook slowly 1 hour.  Pack hot pickles loosely into clean, hot pint jars.  To each jar add 1 piece of stick cinnamon from spice bag;  cover with boiling syrup to 1/2 inch from the top.  Remove air bubbles.  Wipe jar rims.  Adjust lids.  Process 10 minutes in a boiling water bath.


Enjoy!

Oh, Yea, Green Tomatoes!

Just look at that smile!  Girl 2 was so stinkin' proud of herself as she presented me with this basket full of her hard work in the garden.  Yep, that's a giant basket full of GREEN tomatoes!
I asked John what I was to do with all these green tomatoes.  He suggested I make lemonade.  Haha.  My Facebook buddies suggested fried green tomatoes or pickled tomatoes.  I've honestly never had either.  For a couple different reasons, I've basically not cooked all week, so the opportunity for fried green tomatoes never presented itself. I decided to pickle them according to a recipe I found in my trusty recipe book from Canning Club.

In fact, I went a little crazy with the canning today.  Here's a sampling:  green beans, cucumber pickles, pickled tomatoes, and tomato sauce.  Also, I completed the Day 1 portion of the recipe for Watermelon Rind Pickles.  Stay tuned . . . .

Mamaw's Strawberry Preserves

So, Friday I picked us up a flat of these berries.  All that's left are about 10 berries which will top our cereal in the morning.  I did use 4 cups to make a batch of these preserves, but other than that, we've gobbled the rest of them down in basically a weekend.
I was pretty excited to try this new-to-me recipe for strawberry preserves.  It comes to me through my Mamaw, who got it years ago from her friend Virginia Lou, who got it from her mother . . . It's a time-honored recipe. 

I love it for 3 big reasons:
1.  It's delicious!
2.  All the ingredients (and there are only 3)  are natural
3.  It is processed in two separate steps (which seems to make it a less daunting task.)

Bring 4 c. of crushed berries (I used a potato masher) and 1 tsp. Oleo* to a rolling boil.  Boil for 3 minutes.  Add 2 c. sugar, stir well, and hard for 3 minutes.  Add 2 more cups of sugar, stir well, and boil for another 3 minutes. 

*This is not the first time I've gotten a recipe from my Mamaw that calls for Oleo.  The first time, though, I had to look it up because I had no idea what it was.  Here's what I learned: if a recipe calls for Oleo, it is probably at least 50 years old.  Oleo usually refers to the Oleomargerine that was designed as a vegetable-based, more economical substitute for butter.  Interestingly, when this margarine was first marketed, it was white because those in the dairy industry didn't want people to confuse margarine for butter and had legislation passed against the coloring of margarine.  So, basically Oleo refers to margarine.  I actually used a pat of butter in my preserves this time.  Its job in this recipe is to minimize the foam you have to skim off after the rolling boil.

Remove from heat and skim.  Let stand overnight.  (I love this part of the recipe because it breaks the process down into two parts, the preserve cooking and the canning.  Usually, when I can something, I have to block off a huge chunk of time to produce the food then can it.  But, I was able to whip up the preserves in about 15 minutes Saturday, then can them Sunday morning while we were all getting ready for church.)

The next morning, process in a water bath canner for 10 minutes.  (You could also freeze it.)


We've already enjoyed it on toast, and Mamaw says its thinner consistency makes it a good topping for icecream, too.  Maybe once I make us some goat milk frozen yogurt, we'll give that a try!

Thanks, Mamaw, for yet another great recipe! 


The Beauty of Food


When I handed my Mamaw a jar of the plum jelly I'd made, she held it gently with two hands.  Then, she stepped out of the dark hallway, into the light of the kitchen, and held it up to take a better look, "Oh, Ashley, it's beautiful.  Just beautiful."

Later, when we were discussing how I make my dehydrated apples, she commented on how white they were and wondered how I keep them from turning brown.  I told her, and she said again, "Well, they're just beautiful."

It made me smile, of course.  And, I just kept thinking about it.  Sure, we still appreciate the beauty of food a bit.  We like our salads to look nice.  We admire a "colorful plate."  And presentation is key in nicer restaurants.  But, Mamaw admired that jelly as if it were a work of art -- something much more than food.

And, it is.  It's the fruit of labor.  It's the beautiful result of a 2-day long process of sticky stirring and straining and boiling and wiping and more.  And Mamaw, who knows well what it is to stir and strain and boil and wipe, appreciates it; she appreciates it in a way that others just may not be equipped to.  She can see that jelly as something so much more than just the sweet topping for a biscuit. 

At one of my first canning club meetings, some ladies were discussing how to keep the cinnamon pear chunks from floating to the top of the jar.  I wondered, "Why do we not want them to float to the top?  Will they spoil?"  Apparently, the reason we don't want our fruit or vegetables to float to the top is that it looks better in the jar when the fruit is evenly distributed throughout the liquid.  Looks better?  I laughed  a little to myself.  Who cares?

But, when I made my own batch and took great care lining them up in neat rows on the pantry shelf, I got it.  There's a pride in producing your own food, in taking the time to do something the "old" way, the slow way, the time-honored way.  Everytime I pop the top off one of those jars and serve up a side dish of pears for Little Boy's lunch, I can't help but note how beautiful they are. 

Mamaw, you're right.  My jelly is beautiful.  And your ability to see that is one of the many beautiful things about you.  Mamaw, thank you for teaching me how to can green beans and pickles and jelly.  Thank you for being so proud of me in all my "homesteading" endeavors and for faithfully reading this crazy blog.   Thank you for seeing the beauty in my jelly and in me.   Thank you for being the beautiful, inspirational woman that you are.  I love you.  Happy birthday!

Plum Jelly: Day 2

Okay.  This post is pretty lame.  I'll just admit that now.  I mean, for starters, this is the only pic I got of Plum Jelly Day 2.

And, I can't even seem to figure out how to rotate it.

Here's the deal.  Jessica and I were having so much fun chatting, we were doing good to get the jelly done.  Timers were going off left and right, and we were just chatting away, completely disregarding directions like boil for exactly 1 minute.  It wasn't until we were finished that I remembereed that I should've been taking pics along the way.  Amazingly, the finished product was great despite our lack of attention to the project at hand. ;)

Since the juice was ready for us, the process was really pretty simple.

Bring 4 c. juice and 6.5 c. sugar (yes, you read that right) to a rolling boil.  Then, add one pouch of fruit pectin.  Bring back to a boil and boil rapidly "for exactly one minute."  Fill your pre-warmed jars and process in a boiling water bath for 5 minutes.  Done!

It really is delicious.  Sometimes, jelly just tastes like sugar to me (which is understandable considering how much sugar it contains).  But, this one is really tasty because you can still taste the tartness of the plums through the sugar. 

Thanks, Jessica for hosting Little Boy and I for our Plum Jelly Playdate!  We had such a good time with you guys. 

Plum Jelly: Day 1

Thanks to my friend Jenny, I've had these plums frozen in my freezer since this summer.  I'd been waiting for life to slow down a bit (winter to arrive) then I'd turn them into some plum jelly.   So, this week, my friend Jessica and I made it happen.
After my pear jelly flop (it was runny liquid), I was afraid to try again "the old fashioned way" (without Pectin).  I did lots of research -- I searched online, questioned my fellow canning club members, and called my Mamaw.  I finally decided that we'd use pectin this time and picked up a few pointers on exactly how to make it happen.

Step 1 (and Day 1) was to extract the juice from the plums.

First, I thawed them.  The directions I had said to pit them but leave the skins on, then roughly chop.  Twenty minutes into the pitting process, I decided that it was entirely too tedious.  (I am willing to work hard, but tedious work really grates on me sometimes.)  I decided there had to be a faster way.  After all, I was planning to strain the juice once the plums had cooked.  Why not leave the pits in?  So, I threw whole plums into the food processor to "roughly chop" them. . . . and I broke my food processor.  Yep, this smart gal pushed the pulse button once and a piece of plastic flew dangerously across the kitchen.  Lesson learned.  Plum pits have no place in the food processor.  (Maybe I can order a replacement part online -- it's hard to imagine life can go on long without a food processor.)

Still not willing to pit the plums, I threw them whole (not even roughly chopped) into the saucepan (4 lbs. of plums to 1 c. of water) and began to mash them with my potato masher, splattering plum juice ALL. OVER. MY. KITCHEN.

Still, I proceeded.  I brought the mashed plums to a rolling boil and, stirring pretty much constantly, kept them at a boil for 10 minutes. 
The plums magically turned to juice!  Stirring, I could feel the pits and skins, but otherwise it was liquified.

My Mamaw had advised me that I could strain through pretty much anything, depending on how much pulp I wanted in the finished product.  This first go round, I was hoping for a nice, clear, clean-looking jelly, so I strained it through  my butter muslin (which is a tighter weave than cheesecloth).  I allowed it to strain for several hours.  And, of course, in my impatience, I would come in and squish and squeeze it a bit every hour or so.


Once complete, I had approximately 15 cups of pure plum juice.  It only takes 4 c. of juice to make a batch of jelly.  That's plenty for Jessica and I to use to make 2 batches on Day 2 of this process.  John and I had some juice with our breakfast this week, too.  (It was so thick and tart, though, that we watered it down and added some Agave nectar to counter the tart taste a bit.)

So, despite my ridiculous antics, I did end up with beautiful juice.  My food processor and splattered walls may not agree that it was a full-on success, but there's at least some value in lessons learned, right?

More on how we turned this yummy juice into jelly Monday (Sunday is my day of rest, remember)!

The Answers Revealed

Okay.  I'm sure you all lost sleep over this last night, so I hate to keep you waiting any longer.  Here are the answers for the three canning club quiz questions that I missed:

1.  The spores of Clostridium botulinum can be destroyed by canning the food at a temperature of ___ or above for a specified period of time. 
a. 230 F
b. 240 F
c. 225 F
d. none of the above

I put "none of the above."  Since I had no idea whatsoever, it seemed like a decent guess.  The actual answer is (b.) 240 F.  Who knew?


2.  Of the food preservation methods we use today, which is the oldest used by man?
a. pickling
b. drying
c. canning
d. fermentation

I guessed (d.) fermentation.  When I quizzed John (yes, I know I'm a dork), he guessed fermentation, too, saying he just figured folks had been figuring out ways to get drunk for all of time.  Anyway, we were both wrong.  The correct answer is (b.) drying.  I guess this should go right along with tanning hides and such for clothing.


3.  Why should cream style corn only be canned in pint jars?
a.  the denseness of the canned product
b. This is the size most commonly used.
c. It is difficult to properly cook a larger amount.
d. Air bubbles are more difficult to remove from larger jars.

I guessed (d.) about the air bubbles, thinking that maybe the thickness made it difficult to remove all the air.  The actual answer was supposed to be (a.) the denseness of the canned product.  Maybe the denseness leads to the air bubble problem, though.  What do you think?  Could I get half credit?

For the record, none of you got them right, either!   Somehow, that makes me feel better.  :)

Canning Club Pop Quiz!


So, at this month's canning club meeting, I had to take a pop quiz!   Heaven, help me! 
There were 30 questions in all.  A quick look around the room, and I was quickly intimidated.  The other test takers had lots more, um, experience than I did.  I felt my palms getting sweaty.

As we checked our work (thankfully, we didn't trade-n-grade!), I was pleased to discover that I'd scored a 27/30.  Hey, that's an A!  Of course, the teacher in me couldn't resist the temptation to tally my score and record it at the top of the page.  :)

Here are 5 things I was pretty proud of myself for knowing:
1.  The plastic lids now available for home canning have not been approved by the USDA.
2.  Foods having a pH value of 4.6 or higher must be canned in a pressure canner.
3.  Zinc lids and bail-type jars are not recommended for home canning.
4.  Using the "hot pack" method when filling jars should prevent fruit from floating to the top of the jar.
5.  Soak jars in a solution of 1 c. vinegar/1 gallon water to remove scale and hard water build-up.

Here are the three questions that I missed:

1.  The spores of Clostridium botulinum can be destroyed by canning the food at a temperature of ___ or above for a specified period of time. 
a. 230 F
b. 240 F
c. 225 F
d. none of the above

2.  Of the food preservation methods we use today, which is the oldest used by man?
a. pickling
b. drying
c. canning
d. fermentation

3.  Why should cream style corn only be canned in pint jars?
a.  the denseness of the canned product
b. This is the size most commonly used.
c. It is difficult to properly cook a larger amount.
d. Air bubbles are more difficult to remove from larger jars.

Think you know the answers (without Googling them -- come on, why cheat on something like this?)?  I'll post the answers tomorrow, so comment now with your guesses if you'd like bragging rights!

Pepper Jelly

A few weeks ago, upon seeing our pepper plant heavy with peppers, a visitor to our backyard farm told me that the best pepper jelly she'd ever had was made from habañeros.  I sent her home with enough peppers to make some for herself and then looked up a recipe to try for myself. 

It turned out great, so I thought I'd share.

Ingredients:
8-10 habañero peppers, cored and cut in pieces
8 green bell peppers, cored and cut into pieces
2 c. white vinegar
10 c. sugar (about a bag)
2 pouches liquid pectin
Green food coloring (as desired)

Also, be sure to have gloves on hand.  The habañeros are hot enough to burn your skin.

Peppers are cored and roughly chopped.

In small batches, blend peppers with vinegar until liquefied. 


Combine liquefied pepper/vinegar and sugar in a large pot and boil slowly for 10 minutes.  Remove from heat.  Stir in the liquid pectin and boil hard for 1 minute.  Skim off any resulting foam and add food coloring (if desired).  Pour jelly immediately into hot, sterilized canning jars, leaving 1/4" headspace.  Wipe jar rims and position lids and rings.  Process 5 minutes in a boiling water bath.


This recipe made about 10  half-pint jelly jars.  I had one jar that wasn't all the way full, so I stuck it into the fridge instead of the canner and we ate it that night with cream cheese and crackers.
Yum!  It looks a little soupy here, but it continued to set up, so most jars are a much thicker consistency. 
It was such a success that I plan to do another batch this week to give as Christmas gifts.  (If you turn out to be one of the lucky recipients, just act surprised. ;)

Time for Our October Drawing!

This month, in honor of my recent canning craze, I'm giving away a brand new set of canning supplies!  Starting with the funnel and going clockwise, here's what we've got in this kit:
1.  aforementioned funnel -- fits either standard or wide-mouth jars and allows you to fill 'em up without making a giant mess
2.  jar lifter -- this is an amazing tool!  It expertly grabs jars so that you can lower them into or pull them out of your hot water without burning yourself!
3.  head space-measurer/bubble-getter-outer -- (okay, those may not be technical terms)  The jagged edge has measurements from 1/4" to 1" to help you get your head space accurate.  The other end is used to poke around the edges of your filled jar and get out any air bubbles before sealing.
4.  magnetic lid lifter -- this tool has a magnet on the end and aids you in lifting hot lids out of hot water without burning your hands

Great stuff, huh? 
So, what do you have to do to get entered into this month's drawing?

Comment on this post by Sunday, answering this question:

What's your favorite thing you've NEVER canned? 
Yep, you read that right.  What do you wish you could put away fresh and have for later, but you've never actually tried to do it?

Jelly Fail

Confession:  I've never made jelly. 
Not true jelly, anyway. . . you know, the kind that's made of only sugar and fruit juice.
But, I had this big bowlful of leftover pear juice from my cinnamon pear canning last week and hated to throw it out, so I decided to try turning it into jelly. 


So, I added some more sugar so that the total sugar was what my canning book called for.

(As you can see, I was working on multiple projects at once.  Maybe that was my problem -- multi-tasking failure)

I brought the mixture to 220 degrees as my recipe advised.  Then, I checked for it to "sheet" off the spoon the way the book described.  It didn't.  I let it sit at 220 degrees for several minutes, but it never did thicken up.
I went ahead and jarred it up, hoping that it might thicken during canning.
As you can see here, it didn't.  Oh, well.  Since it was just leftover juice, I'm only out my time and the cost of a couple cups of sugar. 

Those more experienced canners, suggestions?  What went wrong here?

Garden Surprises

Back in the spring, I was able to put up quite a few jars of green beans.  Then, the drought came.  The vines quit producing, but with all my watering they stayed green.  It felt cruel to yank them out, considering all the effort they were making to survive, so I just kept watering them all summer long.  Now that the temps are a bit cooler . . . surprise! . . . they've decided to produce again!
Yesterday I was able to harvest a pretty big mess of beans.  Since I was surprised by this and had already planned our weekly menu, I decided to can them. (Besides, I'm on a canning kick, remember?)

All cut up and ready to go!

Who knew?  Three unexpected quarts of green beans for us to eat this winter. 

Since three jars is hardly worth getting the canner out for, I decided to try my hand at some jelly, too.  More on that failure in tomorrow's post!