Brooding On

Recent Obsession: Tiny Houses

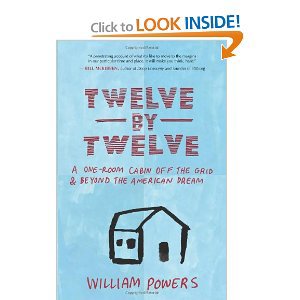
Lately, I've been obsessed with Tiny Houses.  I thought maybe the obsession could be traced back to my somewhat recent reading of a book titled Twelve by Twelve: A One-Room Cabin Off the Grid and Beyond the American Dream, which was awe-inspiring.  I mean, seriously, no electricity or plumbing?


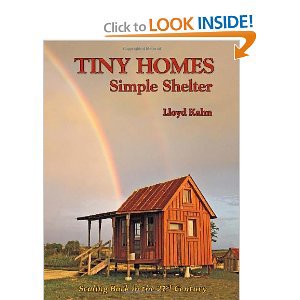
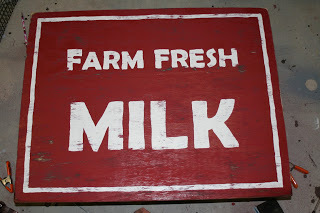
But, then I remembered how my favorite part of IKEA is seeing how they compress everything one needs to live into only 90 square feet or some such ridiculous number.  I love just meandering through the model set-ups they have and imagining what it would be like to live that small.  But, the obsession may go much further back, all the way back to pop-up-trailer camping with my family of 5 when I was growing up.  It was just so amazing to me that we could compress everything we'd need for the trip into that tiny little pod that we'd pull behind the van.  And, the tiny fridge and cooktop?  Adorable.  So, maybe it should be no surprise that I find Lloyd Kahn's Tiny Homes:  Simple Shelter such a treat.  According to Kahn, a "tiny" home is one that is less than 500 square feet.  This makes a great coffee table book and features amazing images of houses Khan describes. 


One company featured in this book is Tiny Texas Houses, the brainchild of Brad Kittel, whose tagline is "building the future with the past."  Kittel builds tiny homes that are 99% salvaged materials.  Houses are built in Luling, TX, and can be easily transported to pretty much anywhere.  This video gives a visual overview of some of his very cool work.


Our family absolutely loves the outdoors.  When the weather allows, we eat many of our meals outside and congregate in our outdoor living space.  If we lived somewhere with a more moderate climate, I could totally see us attempting to live this small because we'd just spend most of our time outdoors.  As it is, though, it's hard to imagine all 5 of us hunkered down in 400 square feet while being snowed in for days.  Oh, well.  I do follow Kahn's blog via my Google Reader feed, so I guess I'll just have to get my Tiny Homes fix that way.  The blog features a new tiny home nearly everyday.  Check it out here

What do you think?  Could you live that small?  What is alluring about it?  What would you miss most if you compressed your life into only 300 square feet or so?


Happy Fall!

I'll be the first to admit that I often complain about our climate.  And John knows that whenever he decides he's ready to move to Honduras, I'm game. 

But, one day that I absolutely do NOT complain about having 4 seasons to contend with is the day I put out my fall decor.

I definitely don't go overboard, but I do love to put out some things in the house that signify the season.
Now, isn't this little pumpkin cute?  Thanks for the idea, Pinterest.  It really couldn't be much easier to do.  I just printed out a big B in a font that I liked, taped the paper onto the pumpkin, traced the letter with a ballpoint pen (hard enough to make a slight indention in the skin but not so hard that it punctures it), removed the paper, painted within the indentions with brown paint, and sprayed a quick coat of polyurethane over the finished product to keep the paint from running or fading in the elements.
Also on the front porch, my burlap wreath has a fall look.
You may recognize the fall wreath from this post about how I made the original burlap wreath.  All I had to do to give it a fall look was stick in a scarecrow and a few leaves.

Inside, I love this little grouping on the coffee table.  The harvest corn is in a vase that reads "The Lord Provides," the pumpkin reads "Blessings," and the frame holds a picture of my brood, the most amazing blessings the Lord has provided me.

Here, the driftwood log is wrapped in fall garland, and you can see our Thankful Tree.  Each family member got his/her own set of circles to fill with things we are thankful for.  I bet I don't even have to tell you which circle belongs to whom from the samples below.  ;)


Anybody want to try to guess whose are whose?


DIY Coffee Table Update

This past week, our old coffee table underwent an extreme makeover.  Actually, it got a facelift.  Pictured below is the IKEA $30 or so coffee table that we've had since we moved in 6 years ago.  Recently, it's scratched veneer has had it looking like a 6-year-old-$30-coffee-table, and it had thus been stored in the garage, leaving our living room clear for the impromptu family dance party.    I'd been missing a place to set a book and prop my feet, though, and found this idea for an upgrade on Pinterest.  (Don't worry, dance parties will continue.  We'll just have to dance around the furniture and maybe keep the cartwheels and break dancing moves to a minimum.)
We had a bunch of scrap 2x4s from our goat shed project last month, so I decided to use them to create a new top for the beat-up table.

We didn't have enough long pieces to cover the table top, so I decided how I wanted to piece the boards together.  Then, I cut them to length.

Yep.  I cut them to length. . . . using this.  All on my own.  John wasn't even home.  Can you tell I'm a bit proud of myself?

I then stained them using Mission Oak, a color that I thought would go well with the veneer finish of the table and still lend a rustic feel to the knotty pine boards.

Once the stain was dry, I used wood glue to adhere the boards in place and stacked heavy books atop the table to hold them down as the glue dried.

24 hours later, we removed the books and moved our table back into place.  (Girl 2 really wanted to be in the picture.)

Here it is, all done, with the lower shelf back in place, holding our floor pillows.

(As you can see, I haven't quite decided what I want to sit on it.  ;)

It's not a professional job, by any means, but I do think it's an upgrade.  And, all it cost me was the $10 or so that I spent on the stain and wood glue.

Getting Crafty: Children's Art Display Frames

Until this week, I've been going through a bit of a crafting drought.  I guess I've just been so busy with having all three kids home all day and caring for the little farm we've got going on in the backyard that inside fun projects have slowed tremendously.  But, this past week, I made two dresses and completed these frames, so I feel like I've got my crafting groove back.  :)
I started with these 3 old frames found on the cheap at a local flea market.

I dismantled them and painted them to look distressed using paint I already had on hand and the same paint method I used for our Farm Fresh Milk sign.

Then, I glued some pretty fabric to the backing board (1/2 yard was sufficient for all 3 frames), put it back into the frames, and glued these bulldog clips to the fabric.

Then, I hung them and displayed some of the kids' recent artwork.  They were so proud of their framed work!

For those who are familiar with the layout of our house, this shows where the frames are in relation to everything else, next to the mudroom-type bench near the garage and backdoor.

Thanks, Pinterest, for the idea!

Cheap. Fast. Good.

If you subscribe to Real Simple and skip over the editor's note, you're really missing out.  Kristin's column is always entertaining.  This month, she discussed the Cheap/Fast/Good theory she gleaned from a friend.  It basically goes that in party planning (and I would add home improvement projects), you can choose two of the three, but that your selections automatically render the third impossible.  For example, the fence we just had put up -- it was FAST and GOOD.  It was not CHEAP.  Or backyard gardening -- GOOD and CHEAP, but not FAST.  This really could apply to lots of scenarios.  Using zip ties to secure the goats' shelter -- FAST and CHEAP, but not GOOD (they ate right through them).

So, since this home improvement project really did accomplish all three, I feel it is a great success!
BEFORE
Notice the garage doors.  Since we've had the house painted and reroofed this year, those doors that had once seemed just fine have seemed more like a washed-out green.

AFTER

Monday, they got a makeover.  Okay, it was CHEAP because all it cost me was a gallon of paint (no primer necessary for metal doors).  It was FAST because I knocked it out in a little over an hour.  It was GOOD because it coordinates well with the new shingle color and completes the "new house" look that the roof and paint were striving for.

Can you think of a home improvement project you've been able to complete that meets all 3 criteria: CHEAP, FAST, and GOOD?

Picnic Table: Before and After

Since Little Boy arrived, our outdoor dining table has been a bit tight, so we decided to add this adorable kid-sized picnic table to our outdoor furniture.  We purchased it unfinished, so it needed a coat of paint to protect it from the elements (and our frequent spills).
BEFORE


DURING

Yes, that's a copperhead.  I was painting away as the kids played nearby.  Girl 2 reached for a toy dump truck and stopped when she saw this snake curled up beside it.  "Snake! Snake!"  I grabbed a shovel and had taken care of business before the kids had made it back outside with John.  Yes, I was proud of myself.  But, mostly, I loved how impressed John was with me.  It kind of made me want to just scour the premesis for more snakes or other terrifying creatures that I could impress him by slaughtering.  Eleven years into marriage, it's good to know I can still surprise him.  :) 

AFTER

We decided to go bold.  Girl 2 chose the color at the paint store.  All 3 kiddos helped me distress it a bit with a sanding block; then, we added a sheer protective coat to the bench seats and table top.  I figure it'll take lots of abuse, so distressing it on the front end might help hide some of the unintentional dings and scrapes and stains.  We've used it so often that I set the dinner table in the house the other night and Girl 1 remarked, "Wow!  It's weird to be eating inside.  We haven't done that in awhile!"

Getting Crafty

From building a pen, to painting the inside and outside of their shed, to carefully selecting, stacking, and filling their food bins, to taking the kids to the store to pick out their collars (and so much more) -- we've done a lot to prepare for our goats' arrival this weekend. 
But, with all of that done, there's nothing left to do but wait.

But, I don't do "idle" very well.  So, I decided that since their shed looks so nice now that it's been freshly painted, it deserves a little decor.  I found this sign online for $32 (click image to see it on Amazon) and decided to use it as my inspiration.  Honestly, I like my finished product even better! 
The challenge, of course, is to create a new sign that looks old.  To do this, I combined several techniques I read about on various other blogs and Pinterest.

1.  I started with this piece of plywood which used to be a part of our rabbit pen, but has since made its way to the trash pile because my amazing hubby has built Cocoa Puff a great new hutch (that's a future blog post).

2.  I knew I wanted to distress the wood, so I painted it a dark brown (leftover from our kitchen update a couple years ago) first so that that would peek through later on. 
3.  Then, I topped the dark brown with a red (leftover from our chicken tractor).

4. I chose a font and printed out the lettering.
5.  Once I had an idea of where the lettering would go, I used a yardstick to draw guidelines for where I would paint the white border.

6.  I painted the white border with paint leftover from painting the garden boxes. 
7.  Once it was dry, I laid out the letters and traced over the edges with a ball point pen, bearing down hard so as to create an indentation in the wood.

If you look closely, you should be able to see the indentation left behind by the ballpoint pen through the paper. 

8.  Paint the lettering.  I do not have a very steady hand, but the indentation in the wood creates a kind of well that keeps the paint from spilling over out of the lines.  This method really worked great! 

At this point, the sign is finished in its "new" form, but I wanted to beat it up a bit.

9.  This is definitely the most fun part.  Using sandpaper, I just went to town on it.  This allows the dark brown and even the wood beneath it to peek through.

See how the corner reveals the bright young wood underneath, giving it away as a new piece? 

10.  I used some wood stain (leftover from my recent rocking chair update) to age all the spots where the wood was showing through.  I applied it with a brush then wiped away excess with a rag.  See how the corner now has a darker, more weathered look?

A closer look at a heavily distressed part of the sign

The can on the left is the Bombay Mahogany Satin stain I used. 

11.  Then, using the polyurethane in the can on the right, I coated the entire finished product to protect my perfectly-weathered sign from actually getting weathered. ;)  I did actually have to buy the polyurethane.  As the only thing I had to buy to complete the project, I was able to do the whole sign project for $6.00.
Here's a look at the finished product.
And here it is hanging on the wall of the goat shed.

I hope the goats will appreciate their decor. ;)

My First Wreath

Oh, Pinterest.  We've developed a bit of a love/hate relationship, I'm afraid.  Just when I think I might be finished with all my projects, I settle in for a few moments of rest and check out Pinterest. . . And the projects begin to pile up again.  Anyway, this wreath (which I love) was inspired by this website which had been Pinned.  Check it out and see how I mimicked the original.  I must have referred to the photo 30 times during the course of all that hot gluing.
These burlap flowers were ridiculously easy to make.  I learned how to make them on this website.  One great thing about using burlap is that the resulting wreath is appropriate for all seasons. 

Mom, I hope you like it.  You'll be getting one as a belated birthday present.  :)

Oh, and here's that up-close shot of the crackled frame I promised you.  :) 

Before and After

Don't you just love before and after pics?  I know I love a good makeover!  And paint is probably the easiest way to makeover things around the house.  Also, paint makes all things clean again. 
Our house, which is cedar-sided was repainted a few weeks ago.  Suddenly, the weathered look has given way to a sharper, redder, more-cedar-looking color.  That's great.  But . . . you know how sometimes the completion of one project seems to necessitate the completion of more projects?  Now that the house and porch look brand-spanking-new, the old rocking chairs look like . . . um, old rocking chairs.  And, John now seems to think that the new paint on the house means we need to paint the privacy fence, a job I dread. 
Before
(I should have taken this pic on the freshly-painted porch so that you could get the full effect.  Oh, well.)


After 
(Aslan seems to like it :)

I've actually gone a little bit crazy with paint this week during my "spring cleaning" of the bporches and yard..  Allow me to list the things I've painted:
 -- rocking chairs
-- a planter
-- two decorative straw placemats
-- two side tables
-- 4 dining chairs
--  dining table
-- the new chicken coop
-- the backyard shed

And, if I do say so myself, things are looking spiffy back there.  I love to have the backyard looking nice because we spend so much time out there during this time of the year.  :)

Old Frame Gets a Makeover

This project all started with this old frame which came to me courtesy of my mom.  (Thanks, Mom!)  The goal was to create a crackled, antique effect for the frame and use it as a chalkboard to hang by the front door.

 First, I dissassembled the frame and painted the glass with chalkboard paint.

Next, I painted the frame with a dark brown paint.  This is the color that will show through the cracks of the top color when it's all done.


After I allowed that to dry for a few hours, I put a thick coat of Elmer's School Glue on the frame. 


I let the glue dry until it was tacky but not runny, then painted the top color, being careful to brush in only one direction (either left-to-right or right-to-left, but not back and forth)

For my top color, I chose an off-white (because I already had it).

When the glue under the topcoat dries, it pulls the topcoat apart and makes a crackle effect.  I'm just now realizing that you can't actually see it very well in this picture.  Sorry.  But, I am in the middle of a wreath project that will hang next to the chalkboard, so I promise, dear readers, to get a better photo of the frame when I post about the wreath.

Spring Color Pop!

Our house is decorated mostly in neutral colors.  This is especially true of our living room (now that it is painted cream rather than blue).  So, for spring, I thought I would inject a bit of color into our living room.  I decided to go with yellow because 1.) it epitomizes spring for me 2.) I love yellow! 3.) I can't wear yellow well.  It just doesn't look good on me.  But, it turns out, it does look good on my sofa!
All told, this little living room spruce-up cost me $6.61 (one can of spray paint and 3/4 yard of yellow burlap to recover the pillow).

I used the spray paint to yellow-fy two frames, one decorative bowl, and two lovely birdies.

Placed at random throughout the room, these little pops of color really bring spring to the living room!

Laundry Closet Re-organization!

I'm working my way through the house doing spring cleaning with a plan completely stolen from my friend Ericka -- tackling one room per week with a deep clean.  In the process, I've discovered something about myself.  I LOVE to organize, but  I HATE to clean. 
Aside from the rug in front of the kitchen sink, I probably stand still the longest in one day, in this spot right here, folding and hanging clothes.  So, I've been very happy by how much this little re-organization project has helped simplify my laundry routine.
As you can see, we have more of a laundry closet than a laundry room.  This arrangement is fine by me because I'd rather not be shut off in a small room by myself folding clothes anyway. However, the closet leaves me with a small space in which to get a big job done.   But, since the re-design, it's working out great!  1st, notice the curtains.  They can close off the space so that I can hide it all when company is over (although now that it's so organized, I may not be drawing the curtain so often anymore).  Also, the bulletin board can hold little snippets from magazines, Bible verses, inspirational quotes, pictures, or stain removal tips. 

On the shelf above the machines, I've added these plastic drawer systems.  The big one has one drawer for each child.  I put all of their clean undergarments, pajamas, and socks into their drawers (at our house, we hang everything else).  When the drawers are full, I pull them out and take them to the bathroom  (where the kids keep all of these clothing items).  When the kids see their drawer sitting on the bathroom countertop, they know it's their job to put their things away and return the drawer to the laundry area (and, yes, even my 2-year-old son can do this :)  The smaller set of drawers holds collar stays (which go in all my hubby's dress shirts, extra dryer bars (we've switched to those instead of dryer sheets), and clothespins.  Atop those drawers is a small trashcan to collect dryer lint (it's compostable, you know) and extra hangers at the ready.

At the very top of the closet, I have crates labeled "Resale" to collect the clothes I plan to put into the kids' consignment sale I participate in twice a year.  So, when I wash that t-shirt that has begun to fit like it should be made of spandex, I can just pull it from the dryer, fold it neatly, and tuck it away in a resale crate until I'm ready to do my tagging for the sale.

Above the washer, the closet rod is divided up into three sections so that I can organize the kids' clothes as I hang them up.  Also, my hubby put up two new shelves for me on the left-side wall of the closet.  One is up high and holds laundry items that I don't need as frequently.

The other one, which is lower, holds my detergent, lonely sock bin, and lotion (does folding laundry make anyone else's hands crazy dry?).

This may well be the best part of the whole project-- there's nothing on the top of the machines!  It's completely free for folding.  So, while I may not have loved vacuuming dryer lint off the power cords or handling the sock retrieved at long last from down the crack by the washer, I am loving the fruits of my labor -- a clutter-free work space!

Storage Problem Solved

The problem:  With 5 busy people in this house and all their school, dance, soccer, AWANA, bike, and cold weather gear, we were having trouble finding WHAT we needed WHEN we needed it.  And don't even get me started on shoes!
So, this pic is what we started with.  This armoire is actually a TV cabinet that we had been using as random storage.  (We sold it for $50 to a FaceBook friend.  That basically covered the entire cost of the project.)  The baskets below are holding the kids' shoes.  The doorway on the left leads to the garage, so this is a highly trafficked area and  one that was not working as hard for us as it could.  It was time for a redesign.
Below is where we were attempting to hang the myriad things we need to be able to grab on our way out the door.  To say that it is overcrowded is a gross understatement.


Solution:  Now, here is the solution I came up with for that wall.  The only thing that stayed was the mirror.  Everything else is new (well, not really "new," just repurposed).

And, here it is once we moved all our gear in.

Here's what I did.  I started with three stacking bookshelves that we already had and lined them up side by side to create a bench.  The collapsible fabric storage cubes hold the kids' shoes.  They each get two cubes and a small space for boots between their cubes.  Lots of stores have these cubes, but I got mine at Home Depot.  I like them because they have lots of color options and have the little pockets that allow you to label the contents of each box. 

To create the seat cushion on the bench, I repurposed an old closet door that we had in the garage, topped it with upholstery batting, and stapled on the fabric (which I already had).  Also in this picture is the 8 ft. piece of pine I bought to stain and use for the long row of knobs.  We bought knobs from IKEA (cheap) and mounted them to the board to create 15 hangers.

For the boot drying rack, I topped a rimmed baking sheet with a cooling rack.  It fit perfectly! Also, it took up the space at the end of the bench that was leftover once I had my cushion on.

For the top level of storage, we cut and painted some IKEA shelving that used to be in the playroom and added more Home Depot storage boxes. 

All told, this was a super-cheap project that allowed us to repurpose a lot of things we already had on hand and left us with a much more usable space.  And the "grab your shoes, backpack, and umbrella" part of our morning went a lot more smoothly today than it has tended to in the past.  :)

Driftwood Centerpiece


Yesterday, I discovered Pinterest.com.  I can already tell that it will be a love/hate relationship.  Today, it was love.  I found inspiration and went with it.  Someone had pinned a table centerpiece that was a railroad tie with holes drilled to hold tealight candles.  It brought to mind the old piece of driftwood that I found along the White River a few years back on one of John and I's anniversary trips to the cabin.  For whatever reason (I think it's its unique shape), when I saw this piece of wood along the bank of the river, I loved it.  I cleaned it up, brought it home with us, and have had it sitting on the back porch ever since.  Today, it was promoted from backportch ornament to kitchen table centerpiece.  Here's what I did . . .
This 1.5" drill bit is the perfect size to fit tealight candles.

I decided which way I wanted to orient the wood on the table and drilled holes in the wood, being sure to keep the drill perpendicular to the floor.

See how perfectly the candle fits!

I put in a total of 7 holes.

Then, I brought it in to the table!  It may not be traditional decor, and it may not stay on the table forever, but I think it's beautiful!  Plus, it was super easy and didn't cost me a penny. I suspect that not all of the Pinterest-inspired crafts in my future will be the same.  That's where the hate part of the love/hate relationship will come in.  :)